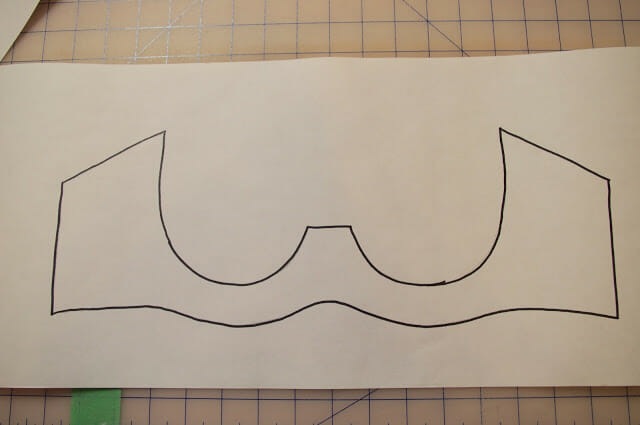
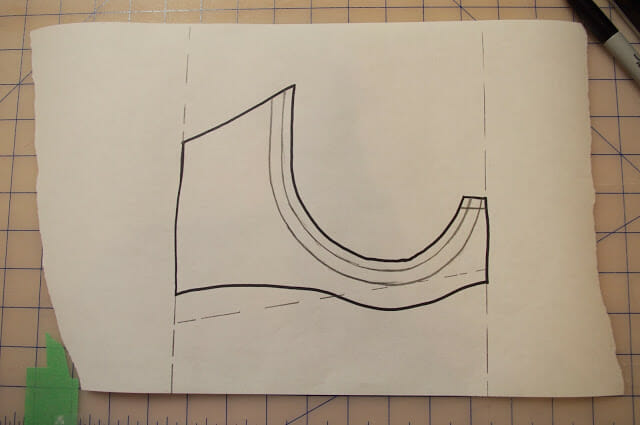
To have a scalloped lace bottom to your frame, you’re going to have to have a straight bottom edge on your frame (as opposed to this pattern piece that has a nice curve following the cups), because your lace fabric edge follows a straight line.
But before you go and chop off the bottom of your frame- let’s do a little deconstructing and thinking first, so you know you won’t run into any problems later.
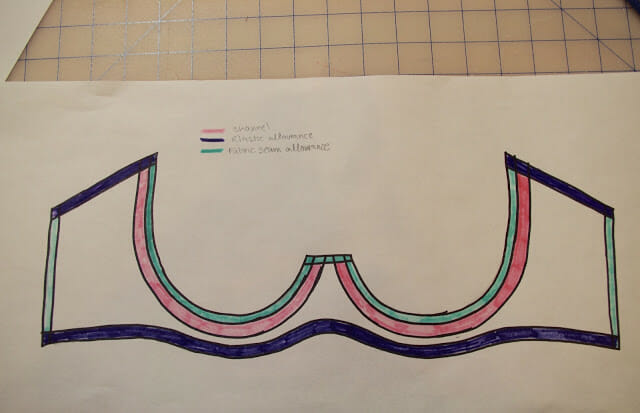
So in this image below, I’ve taken the same frame, but I’ve marked my seam 1/4″ allowances (in turquoise), then I’ve marked where my channelling and underwire goes 3/8″ (in pink), then I’ve marked my elastic allowances 3/8″ for this bra (in purple).
I find doing this gives you a better idea of exactly what is happening with your pattern pieces, and how you can make adjustments to your pattern successfully. So from this you can think about two things that will help you convert your pattern to a lace band:
1. You CAN NOT touch the seam allowances and the channelling allowance around the cup. If you make it more narrow than your 1/4″ seam allowance plus your 3/8″ channel allowance, then you won’t have enough width in your frame to cover your channel- you have to work around that.
2. Your elastic allowance at the bottom isn’t relevant anymore, since you won’t be turning your bottom edge up (because your bottom edge will be lace).
So with that information- there are two ways that you can make a lace band, you can make it in one piece- straight across, or you can make it in two pieces with seam in the middle.
This is the first way:
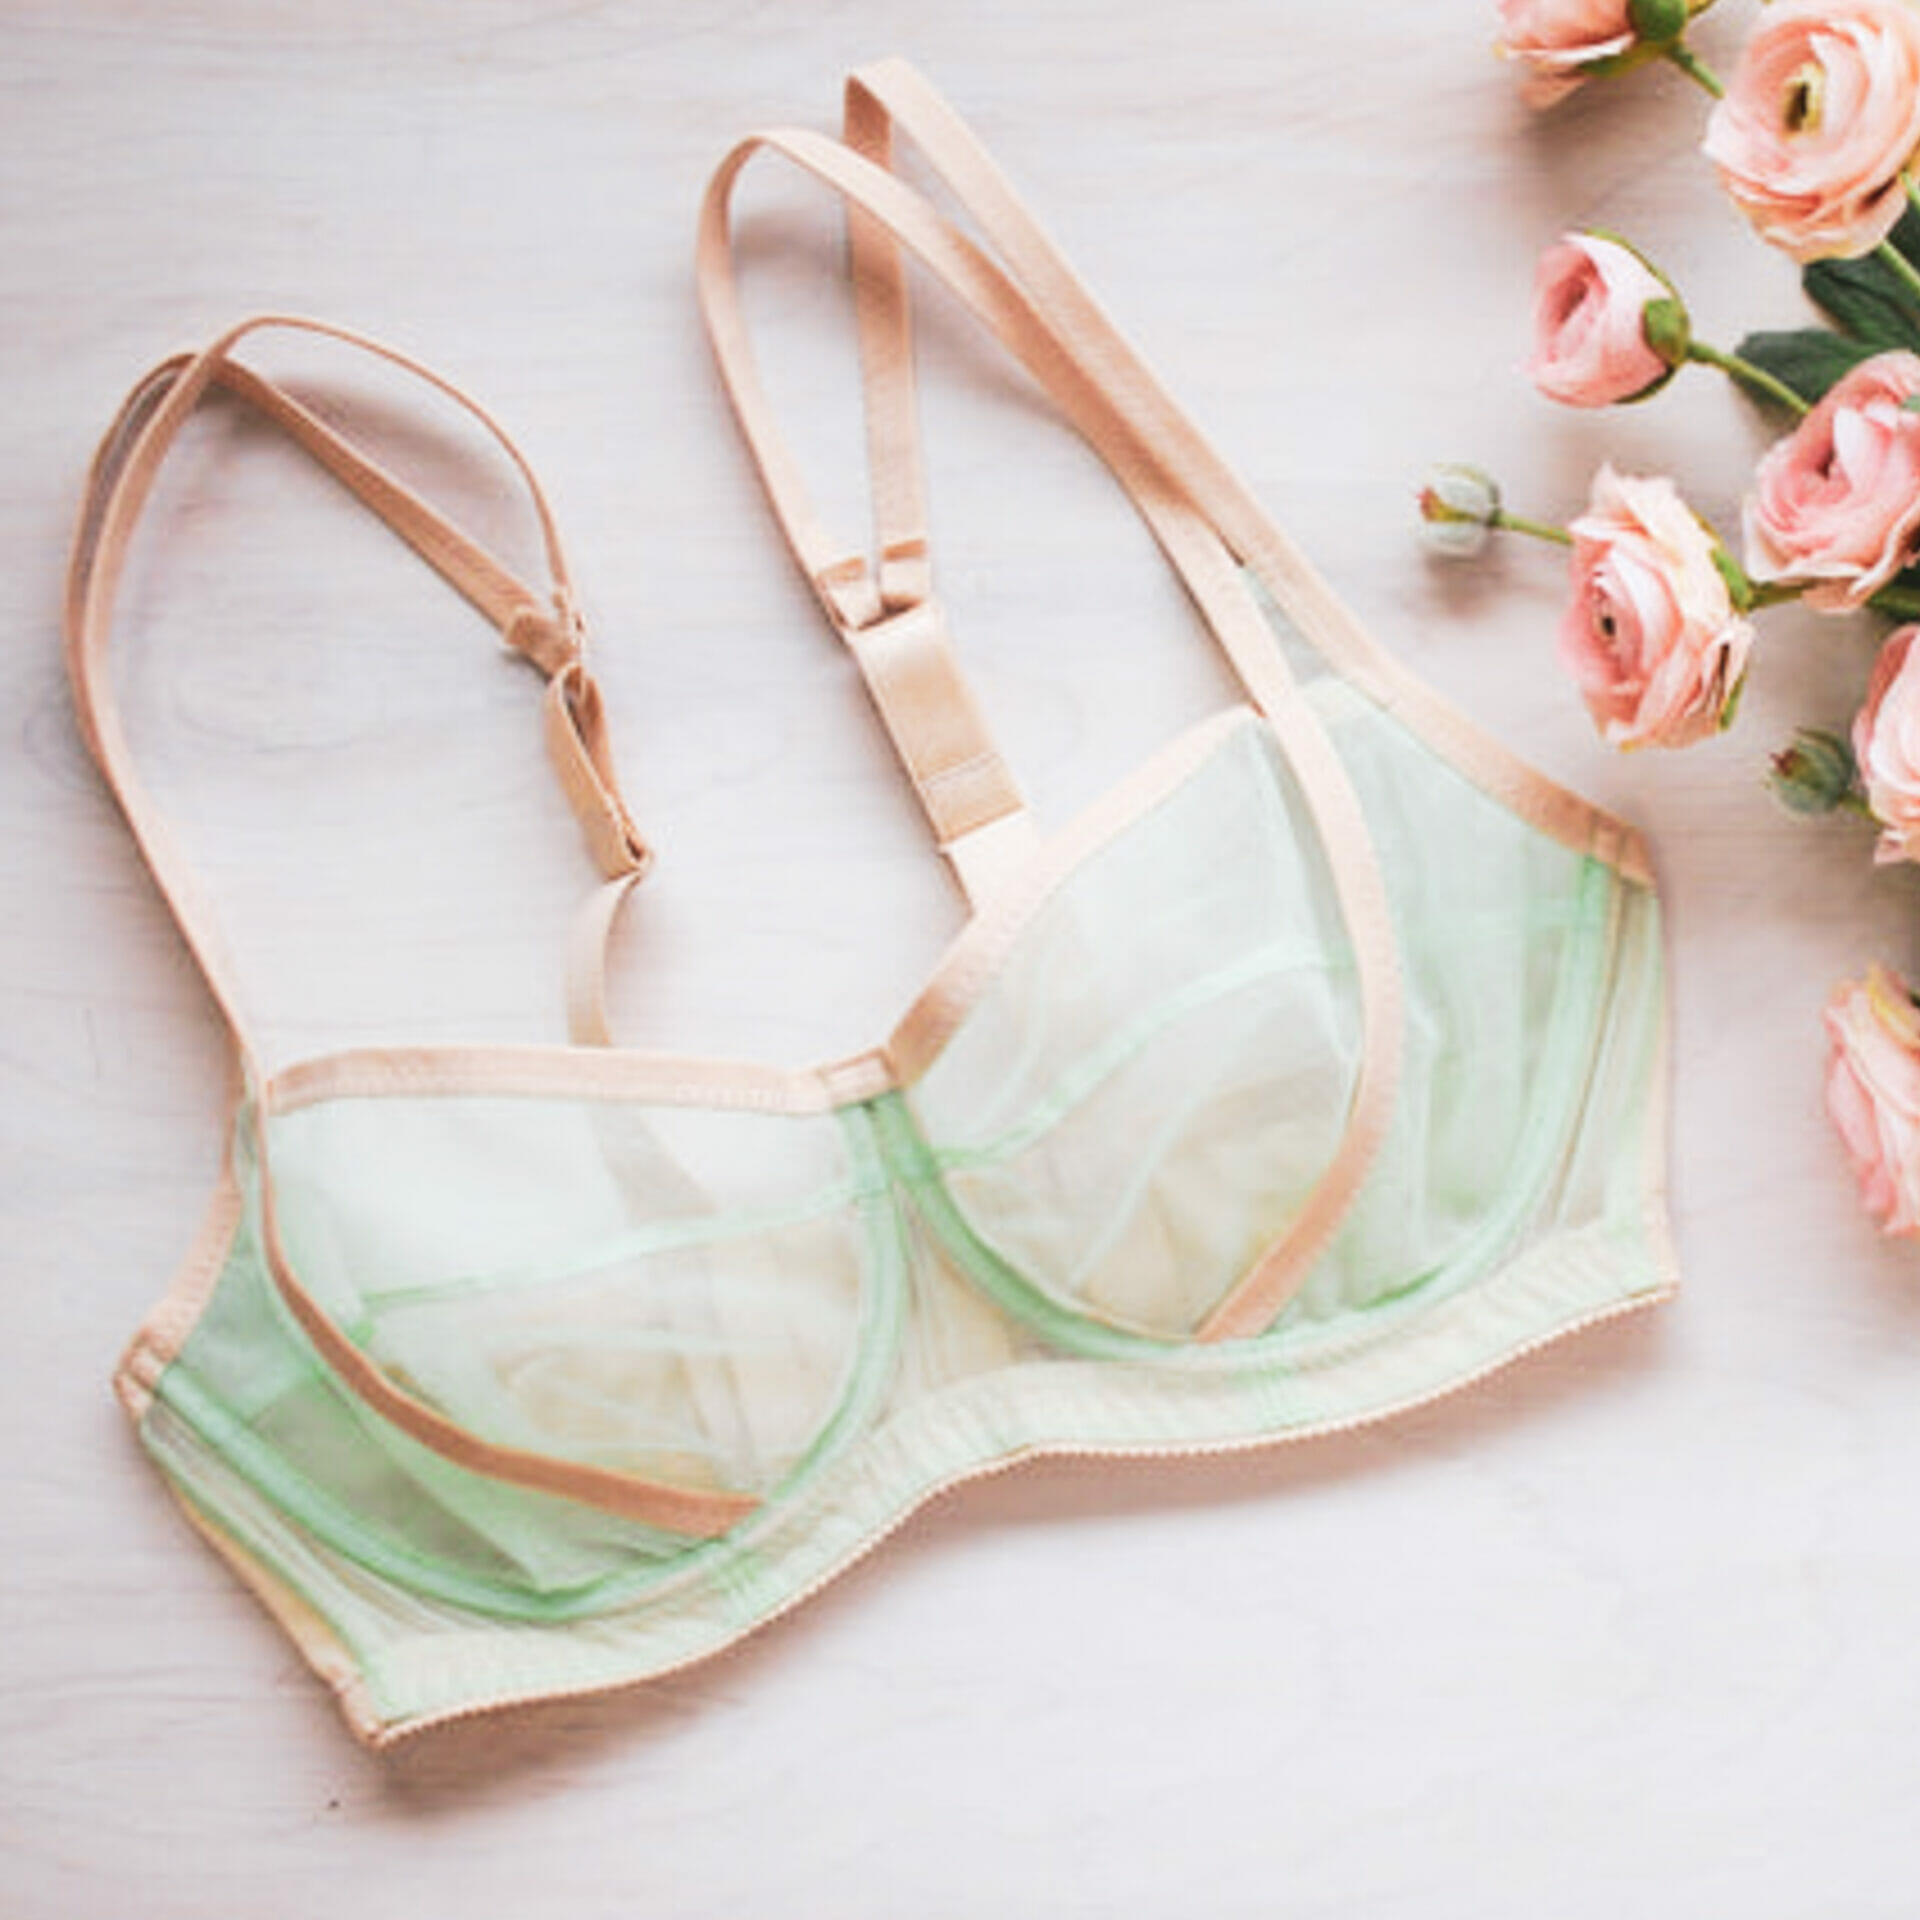
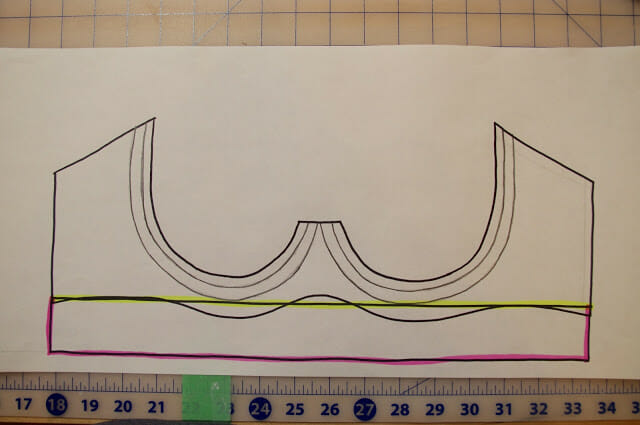
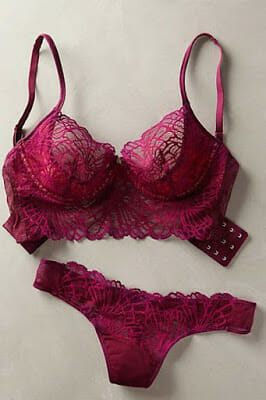
This is if you want to use ONE solid piece of lace for your frame, and it will go straight across. You can go as narrow as the yellow line (right to the bottom of your channels) or you can lengthen it to make it a longer-line for an effect like this bra:
If you are working with your pattern as a half-frame and you haven’t traced the whole thing out like I’ve done, then all you have to do when you draw your line, is to make sure that it is exactly perpendicular to your center front line, so that you don’t have it on an angle.
And remember- this new bottom line is your finished edge, you don’t have to add elastic allowances because you won’t be flipping your elastic in.
So that is the first way to make a lace band. The other way is to make a two-piece lace band, with a seam of the center front. This is my favourite way to make a lace band because I love the angles- this is the same idea as making a gothic arch.
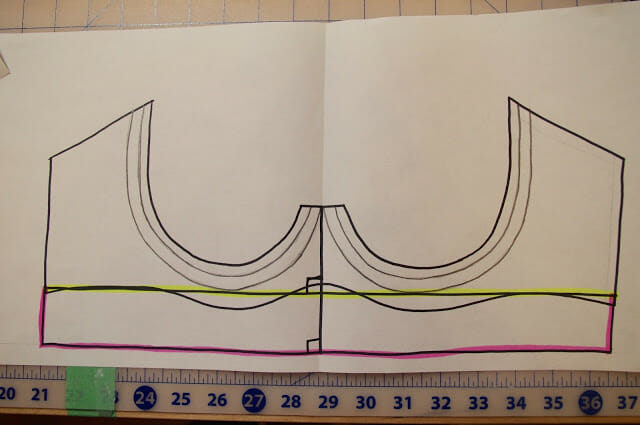
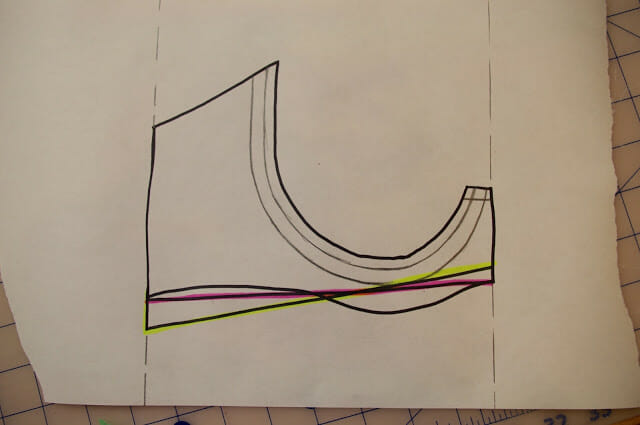
Because this is going to be a two-piece frame (seamed up the middle) it’s easy to show on the half-frame. With this style, instead of making your bottom edge perpendicular to your center front, you’re going to put it on an angle so that your bottom edge will be an upside-down ‘V’.
Now the angle that you choose can be more (the yellow line) or less (the pink line) dramatic, it’s all about your preference- and you also have to remember that for a more dramatic angle- you will also be widening your side seam, and will have to adjust your back band piece to match.
Don’t forget to add a seam allowance to the center front, because you will have a seam there!
So I’ve decided for my example to go with a more dramatic ‘V’.
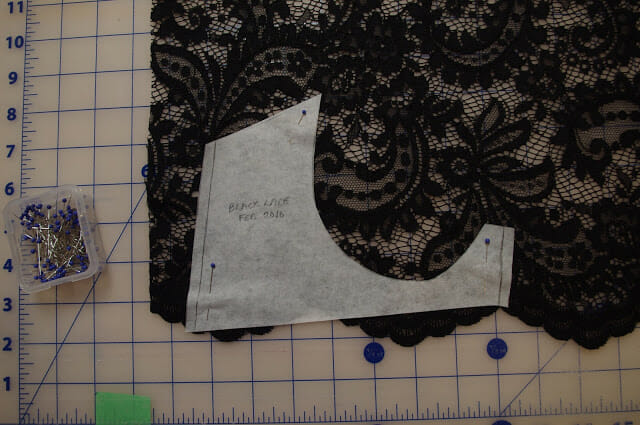
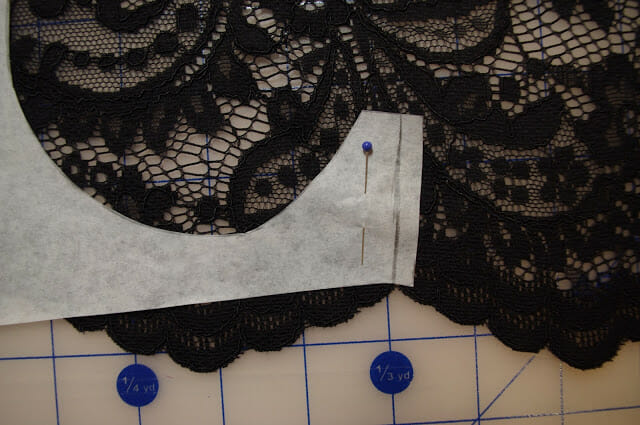
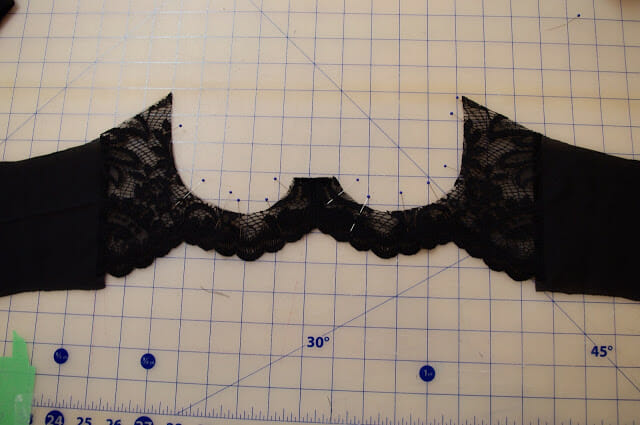
Remember when you’re cutting out your frame, that the bottom edge is your finished edge, and that line should follow the lowest valleys of your lace edge, so that the scallops stick out past that point.
Now there are a couple caveats to this. The MOST important thing about placing your band is that the bottom of your seamlines (where your seams end at the bottom of the band) fall on a low point of the lace- or are touching the very edge of the lace, so that when you sew it up together it’s not mid-scallop and making your seam longer than you intended.
This will sometimes mean that you want to play with your side seams a bit to get the lace to fall where you want it to, and in this case I’m using a lace with big scallops, so I can’t get the lace to fall perfectly along the lowest point, so there is a spot you can see where the lace edge dips in and isn’t covering my pattern piece. That is not ideal, but it’s also not the end of the world, as long as it doesn’t dip in too far or dip in to the channelling area.
Another thing to note is that the most important part of placing the lace is considering the center front. Make sure you have a beautiful center front that is going to look nice will go a long way to making your bra beautiful and look more RTW, in this case I made sure that I started it right at the bottom most point of a big scallop, so that it could fan out on each side from that point. If you have a lace that mirrors than you can cut your frame out to be perfectly symmetrical on each side, and if not, the important thing is to match the scallops!
Once you’ve got the perfect placement, then cut out your linings to match if you’re using them, and sew your frame like usual, matching your center front seam. Then sew your back band onto your frame. Remember that your back band still has elastic allowance, in this case I’m using a 3/8″ elastic so my band sticks out 3/8″ below the bottom edge of my front frame.
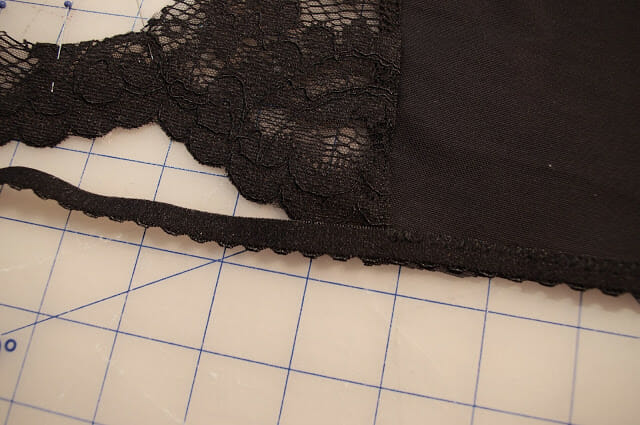
Now it’s time for the first part of elastic application. You’re going to sew your elastic to the RIGHT side of your back band, just like you normally would on the inside edge. But you’re going to stop right at the edge where your back band ends and meets your front frame. You want to be sure that your elastic is sewn right to that point where they meet, so that when you flip your elastic to the inside it looks seamless with your frame. (Also a small aside, I’m sewing my elastic so that the picot edge is facing in, so that it doesn’t compete with my lace edge).
Once you sew your elastic to one side of your band, you’ll want to leave a tail of elastic that is long enough to make it along your frame and cross at the center.
*If you are doing a straight across lace band and want to do your elastic in one solid piece, then you will have to measure your elastic to make sure it is the exact length you need, and you will be sewing both ends of this elastic to either side of your back band leaving it open in the center.*
I like to sew my bra cups into my frame before I sew my elastic to the frame, to help guide my elastic placement, and make sure I don’t overlap into my seam allowances!
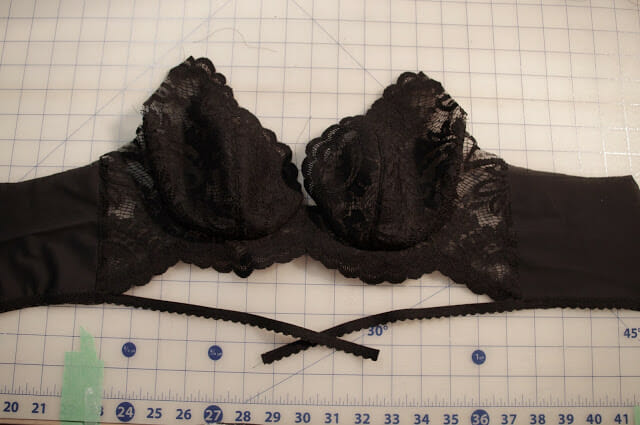
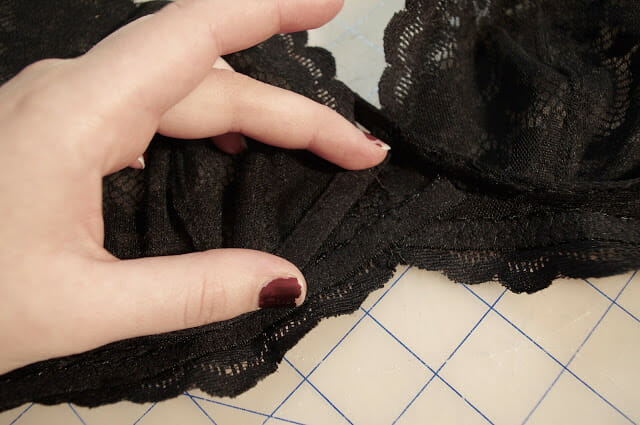
So your next step is to flip your elastic to the inside on your back band and sew your second pass, once you get to where your elastic meets your frame, it should be perfectly lined up, and you can continue sewing your elastic along your frame. If you’re doing a gothic arch like I am in the example, you can pin your elastic before so they cross in the center and you can sew it in one-pass, staying on the inside edge of the elastic again. After you finish this pass the elastic will be sewn down fully on your back band, and you can go in and sew your second pass on the bottom edge of your elastic in the frame.
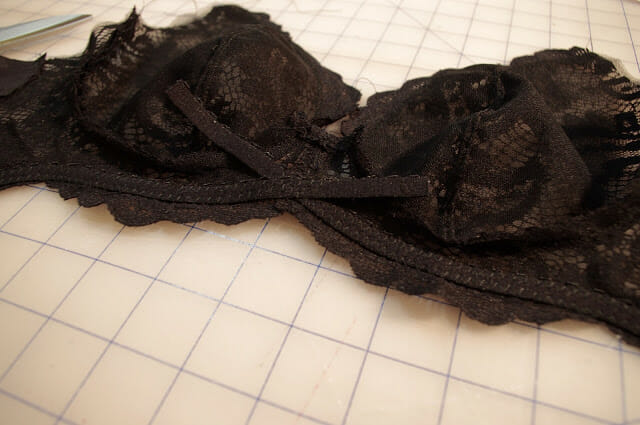
For the gothic arch style, you will have this criss-cross in the front and these tails that stick out. I like to leave these long while I sew on my first pass of the channelling so they are easy to pin out of the way.
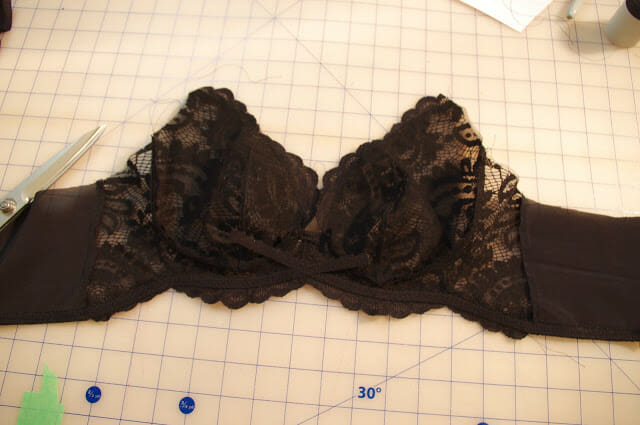
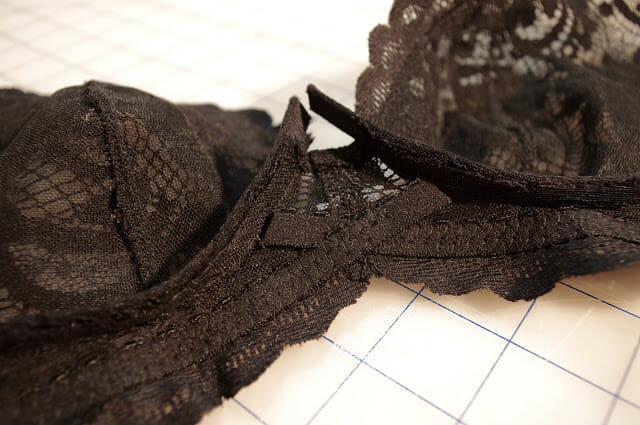
Then, once your channelling is attached, you want to trim these elastic ends so they will be caught under the channelling- for a nice finish.
Then when you fold over your channelling- super neat interior finish!
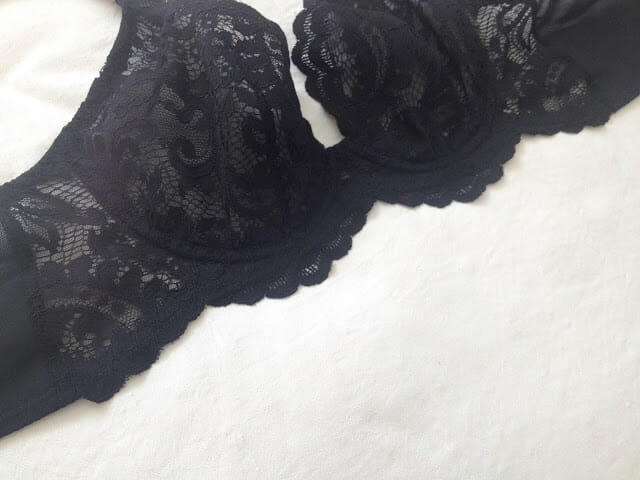
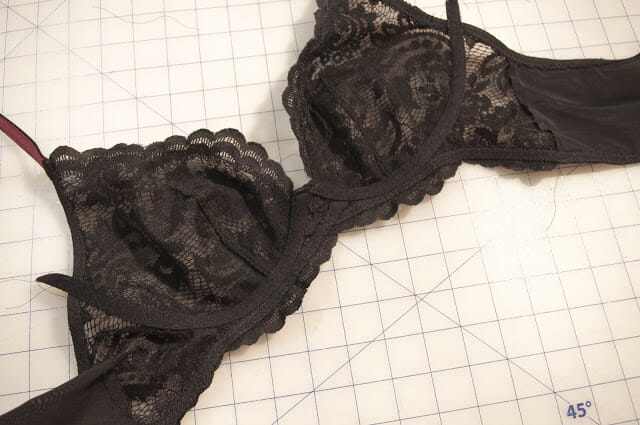
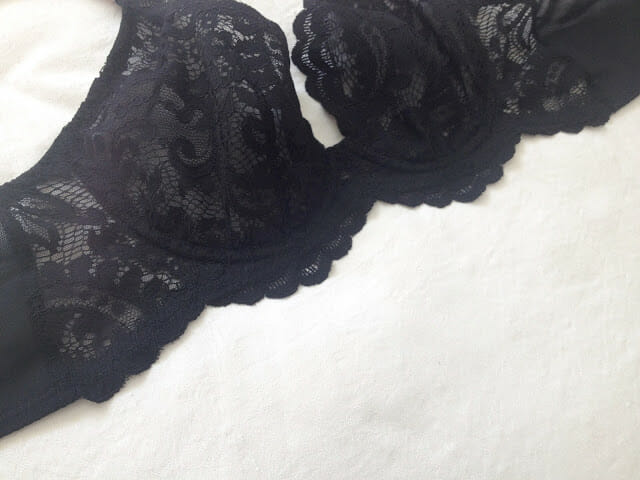
Then you can sew on your underarm elastic, and do your other bra finishings, sew down your channel and voila! You have a beautiful lace band!
And I’m not going to show too many pictures of the final finished bra- you’ll have to wait until next week for more pics!!
That’s all you get for now!!!
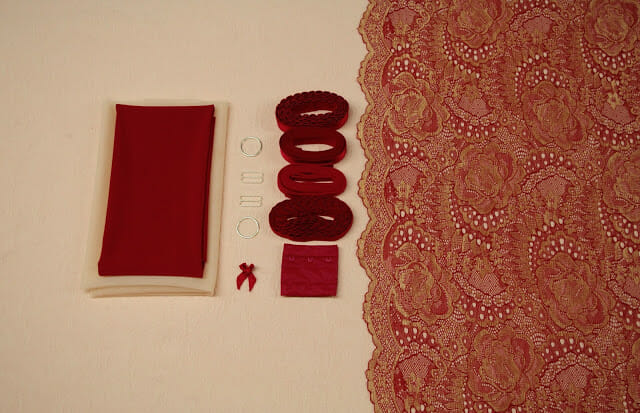
Also don’t forget I still have my Giveaway happening for this beautiful lace kit!!
I’ll be drawing the winner next Sunday! And all you have to do to enter is sign up for my newsletter in the side bar!! 🙂 🙂
Do you have any favourite ways of sewing lace?
Let me know!
Hope you’re all enjoying your Valentine’s Day!!
xo
erin

















Superb tutorial Erin! I especially love the tip to tuck the elastic ends beneath the channeling with the center front seam version — so neat & tidy.
Guess what! I'm going to the US version of "Boob Camp" in May! That should be a lot of fun :D! Any other Bra-A-Month'ers attending?
Thanks Ginny! So many little things with bra-making that make it fantastic 🙂
That's so exciting about your class- should be lots of fun!
Thank you for the tutorial Erin! That black lace is so beautiful, I'm inspired. So many bras, so little time…. O Ginny, boob camp would be superb and I hope you enjoy it – I would love to be there too, but living on the other side of the world. Some pictures would be lovely.
Can't wait to see everybody's lace creations.
Thanks Ilna 🙂 And thanks for the idea for the tutorial 🙂
Great tut-thanks!
🙂 Thanks Amy 🙂
Beautiful bra Erin! And very thorough tutorial.
I'd like to add one thing, because I want others to learn from my fails 🙂
So if you make a longline version, make sure to stabilize only half of the cradle (if you use stretchy main fabric) because if you stabilize the full part it would cause wrinkles on the cradle.
Thank Réka! I always start these tutorials thinking they will be quick and easy, and they always end up huge!
That's a good tip about long-line styles!
Absolutely love your post!! It's a wonderful tutorial, so well explained! I'll definitely try this in the future!! Your bra theory posts are always so inspiring, I'm learning new things each week 🙂 And your bra is so beautiful!!
Thanks Sofia! Bra theory is the best theory!
Once again: very good tuto.
In case of a similar v-shape at the bridge, I do not want te band to end very low at the sideseams. To prevent that, I create another seam (or actually 2) in the bra band: at the lowest point under the cup (a.k.a. the A-mark in the Classic Bra pattern. This seam allowes me to go from this A-mark towards the side seam in a different angle.
Hope you know what I mean by that (expessing myself in English can be a challenge sometimes… )
Thanks! Yes this is a great idea to change the angle of the band. The only problem I can see is if you have a lace with large scallops like the one that I used in this tutorial- because you would have to make a seam mid-scallop. But that is great for lots of laces!! Thanks 🙂
You 're welcome!
I have learned so many things from you, I'm glad to be able to give you something small as this in return.
Wow I love this! I would have never thought to finish the elastic in the front that way, and I love how you used the scalloped edge of the lace. Inspirational!
Thanks Meg! So happy I could inspire 🙂
Love this blog so much
Great tutorial….is the lace band a stretch lace or stable?
I used a stable non-stretch lace for this, but it is only across the front band, it’s completely powernet at the back- gotta have some stretch somewhere!