


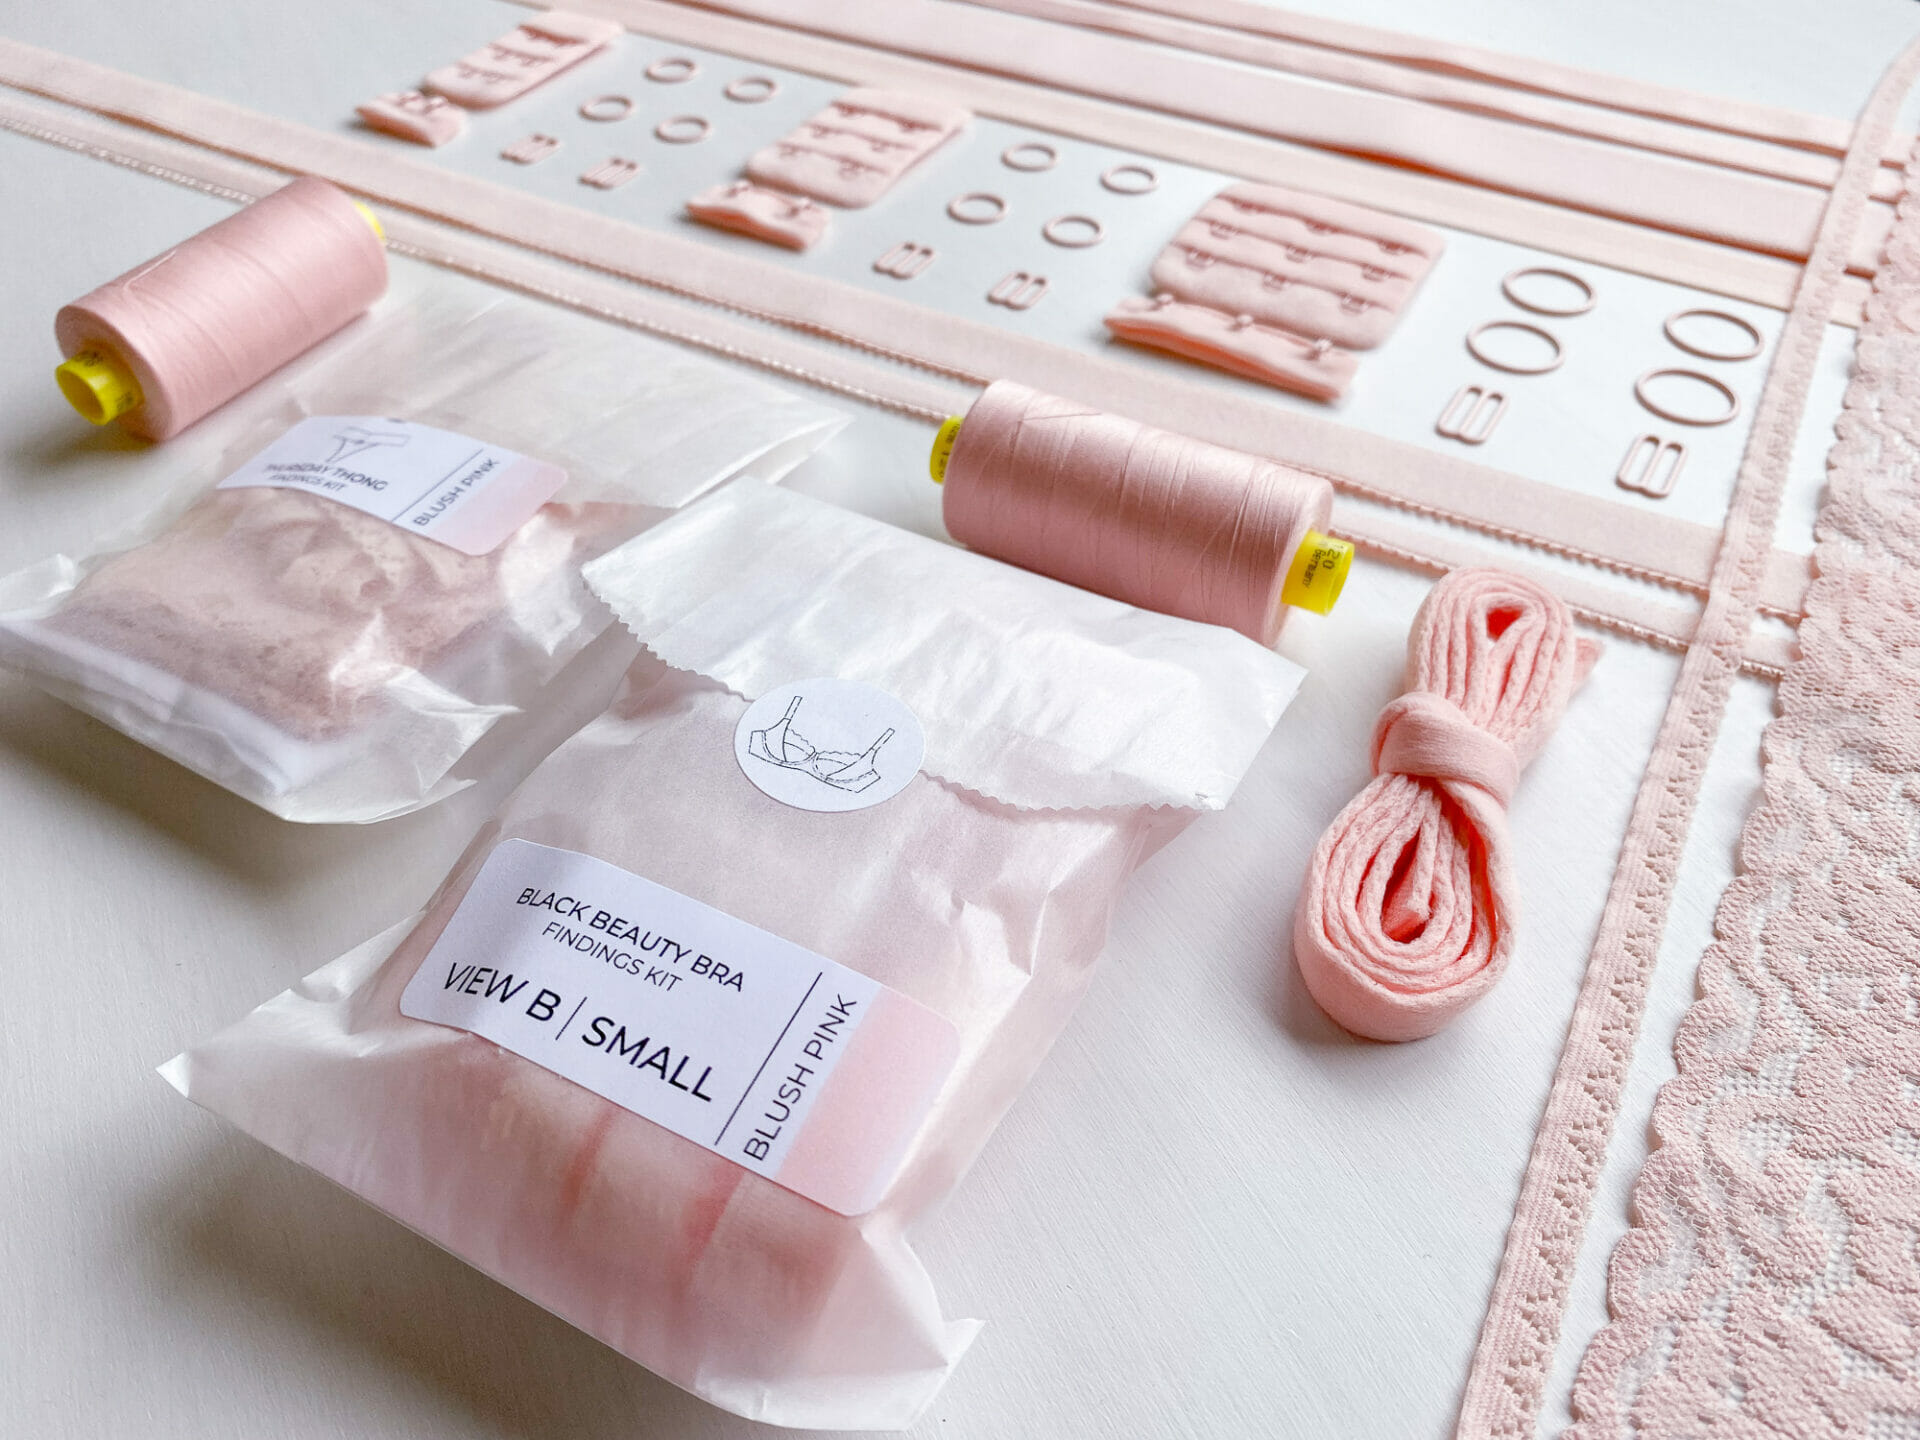


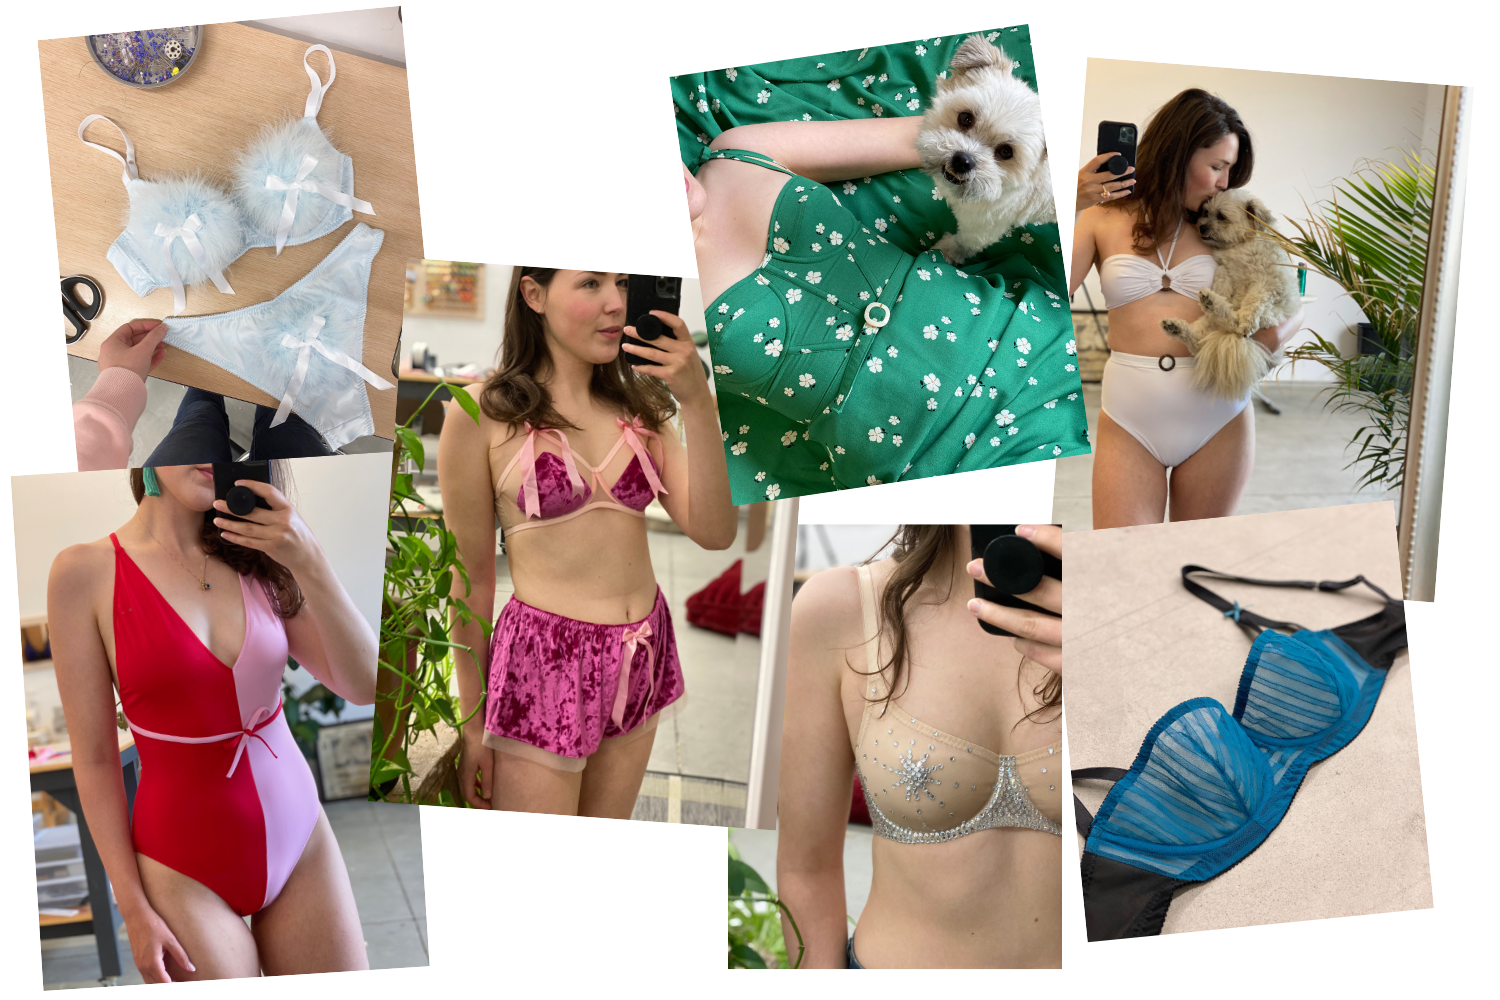

Hi All!
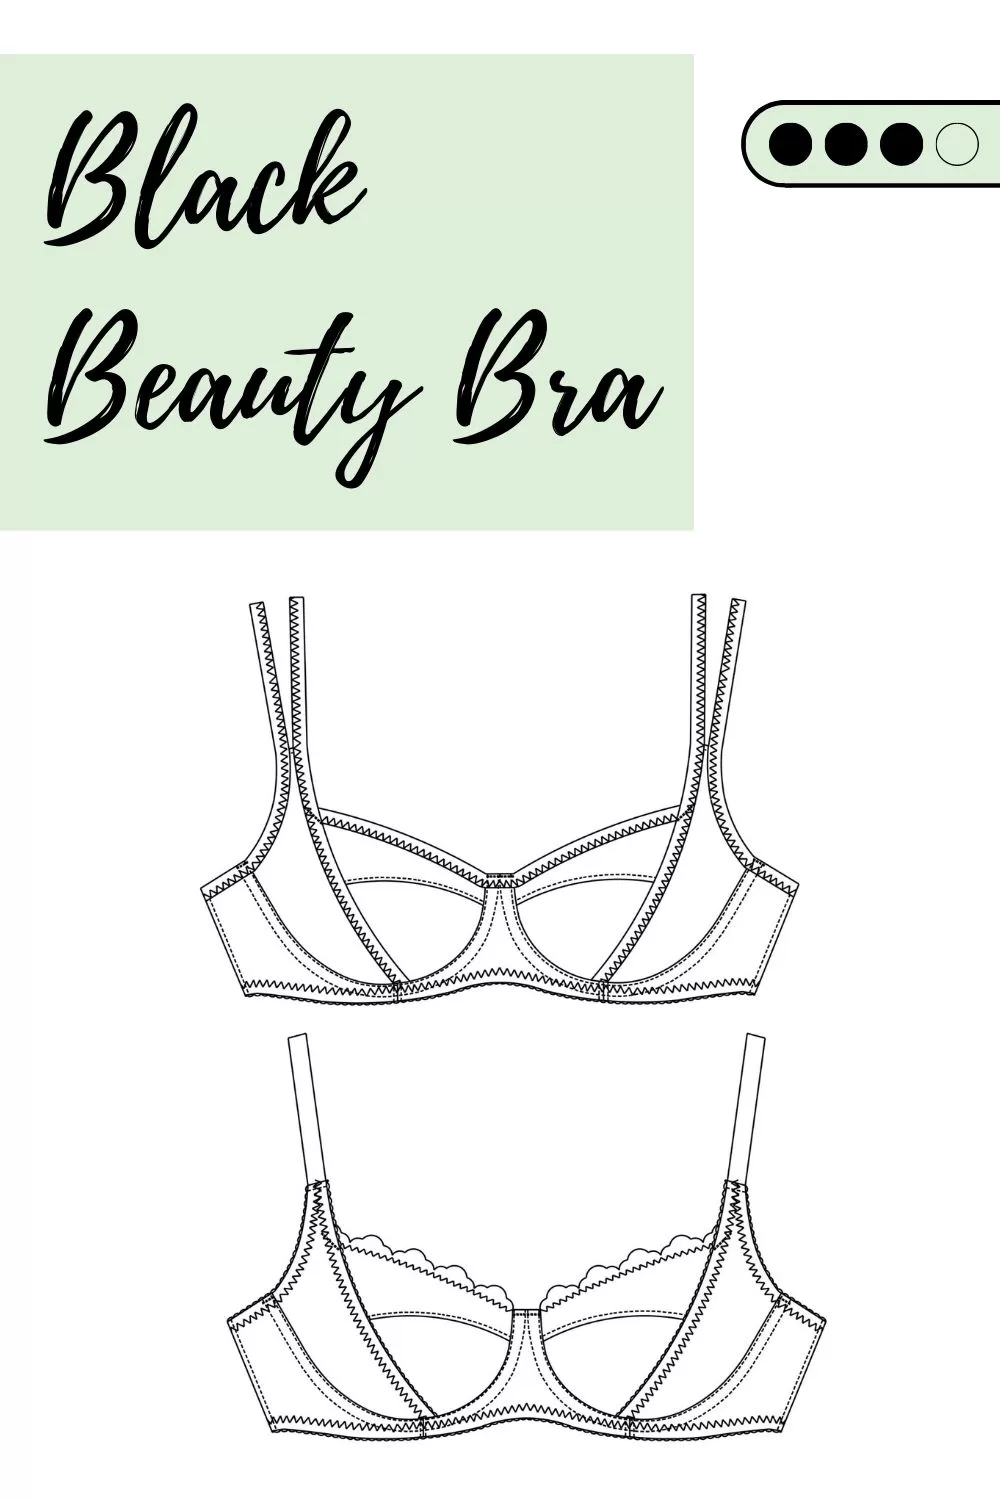
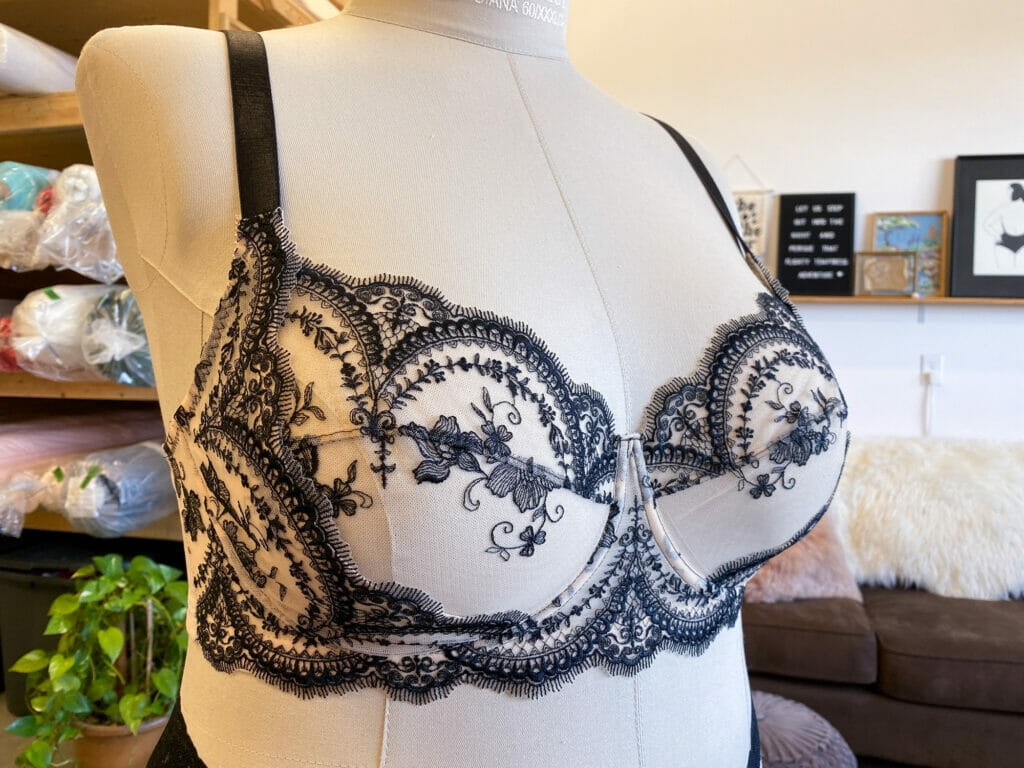
I’m back with another tutorial and this one is about modifying my Black Beauty Bra pattern to have a lace edge powerbar and cradle.
The View B option of the Black Beauty is designed for lace, but I wanted it to be a flexible design where you could have a small amount of lace and only need the lace edge along the upper cup.

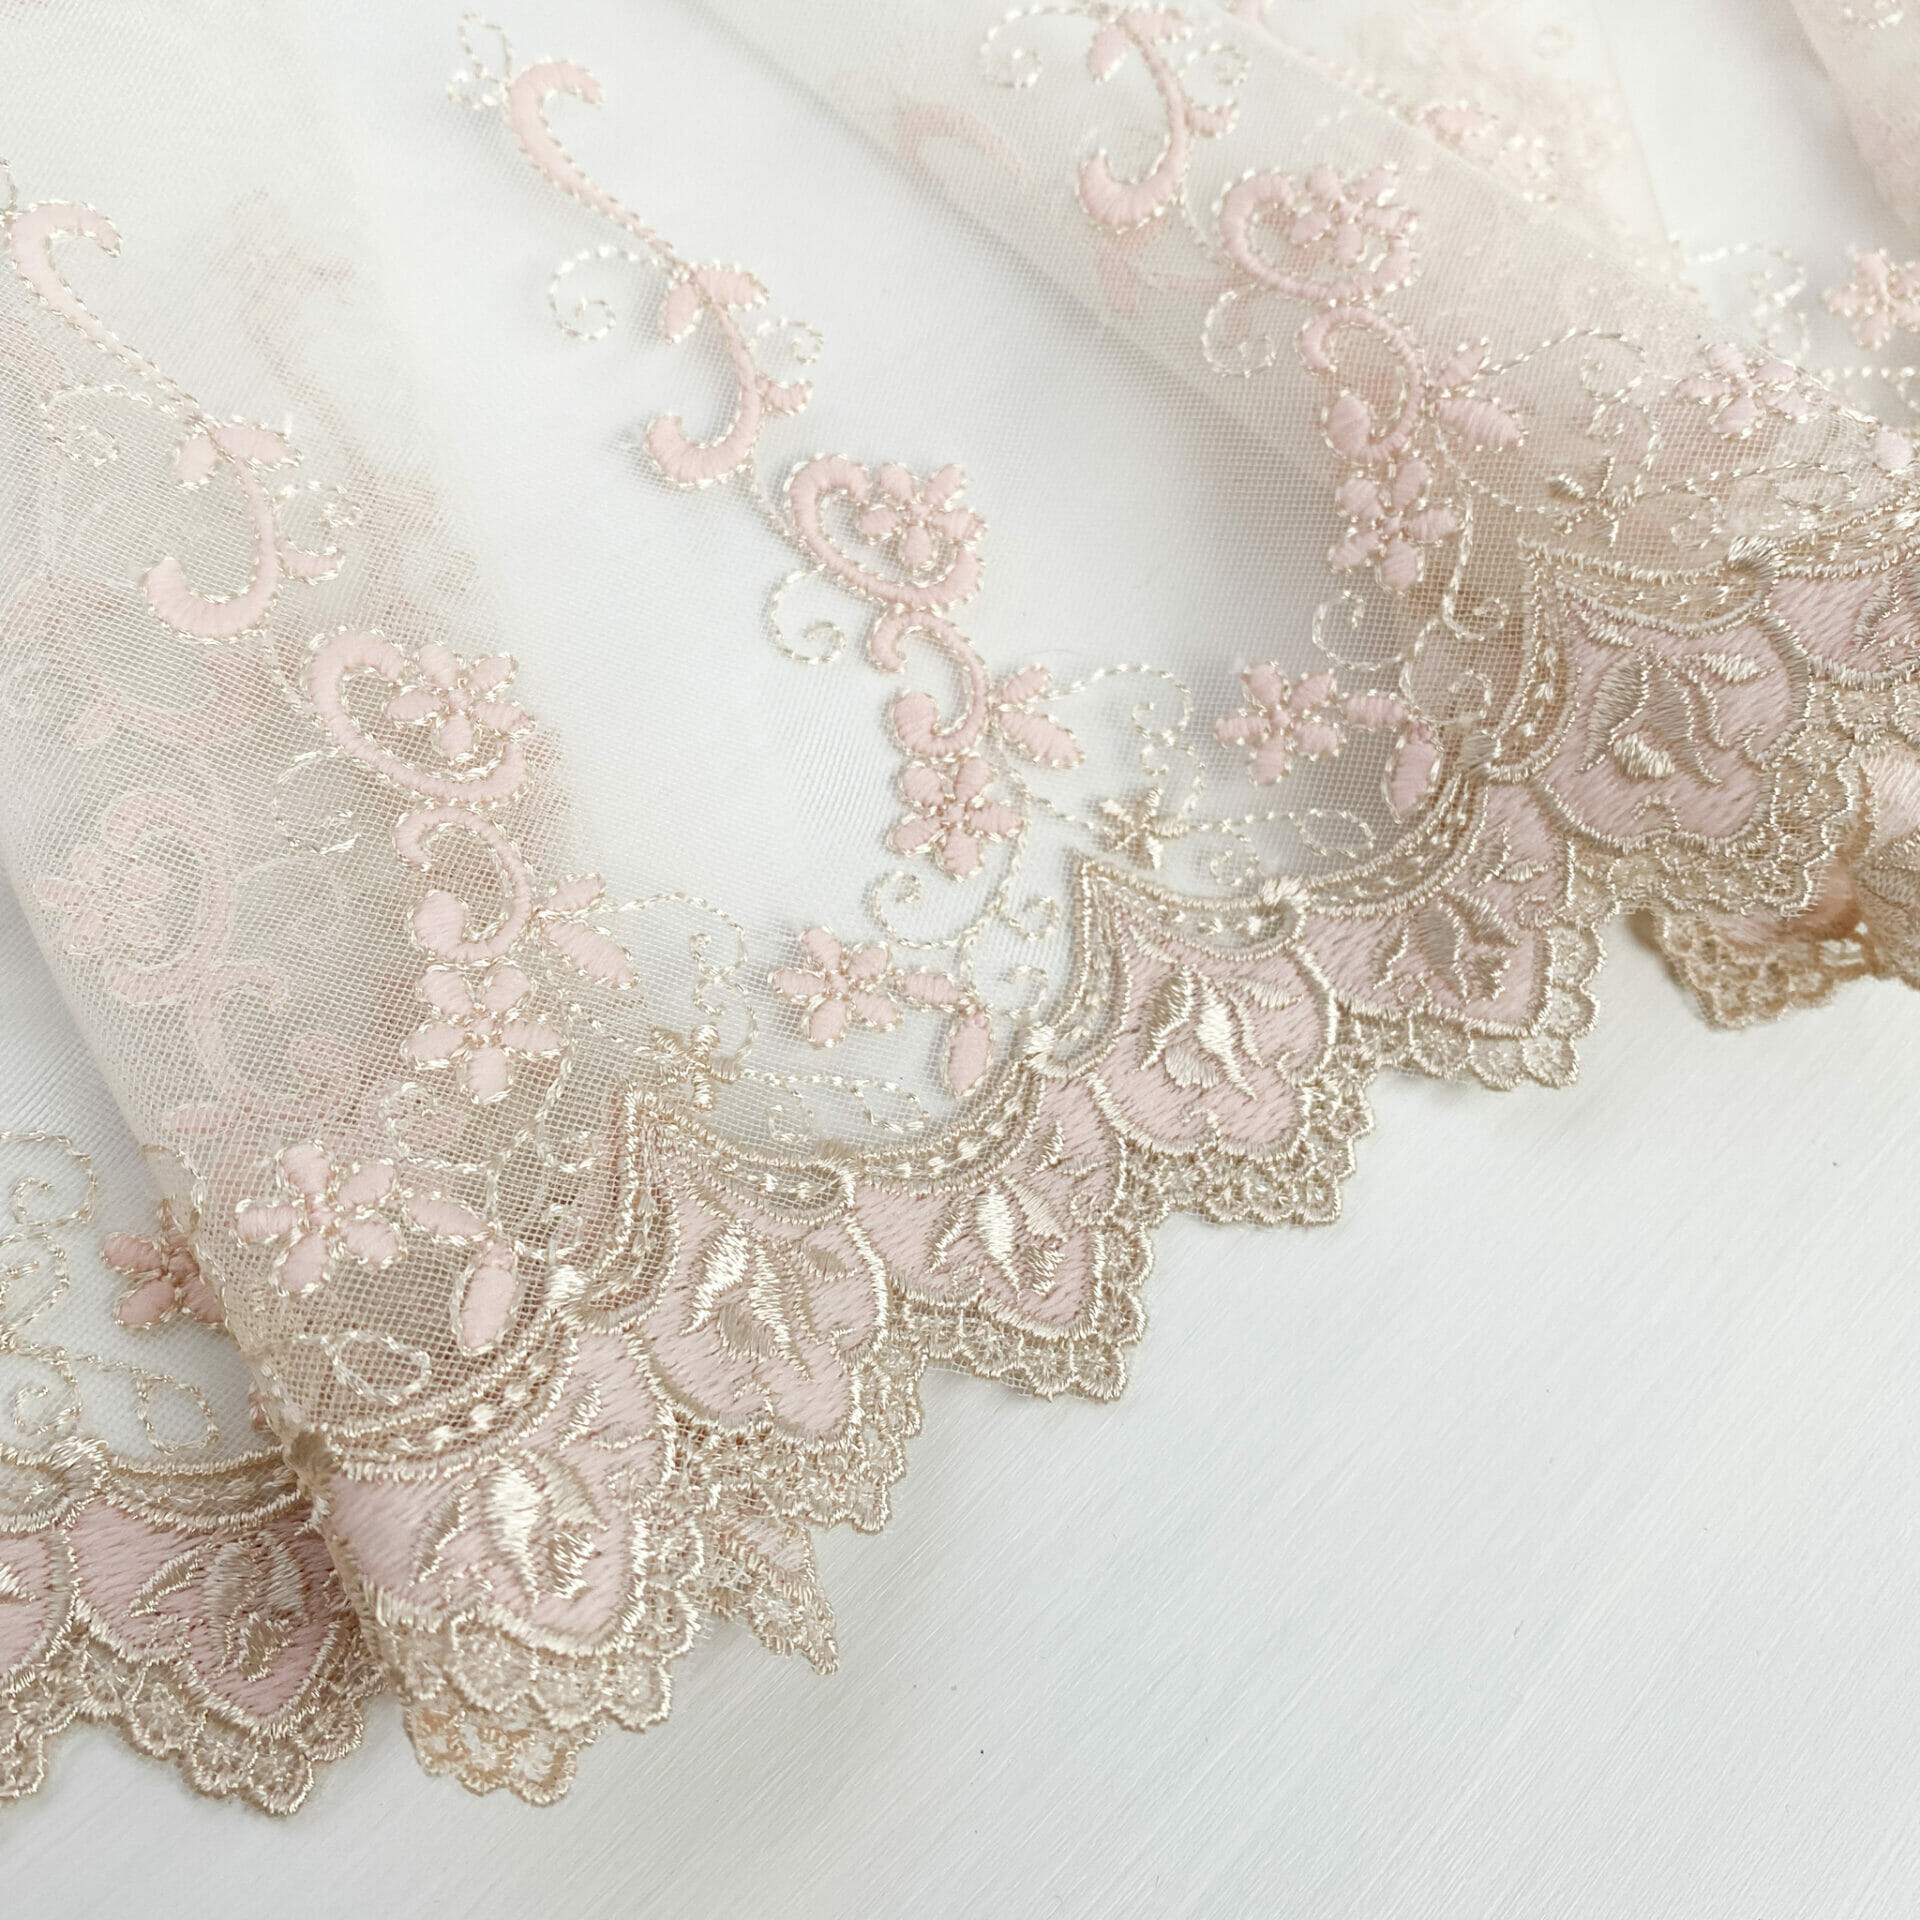
But often I make bras with embroidered lace trims, where I have a lot of lace edge to work with, and it’s nice to use it to the maximum potential and show off that scalloped edge all over the bra. The powerbar and the cradle are two parts of the Black Beauty Bra pattern that are perfect to modify for a lace edge and in this tutorial I’m going to show you how to modify the powerbar for a lace edge, and two different ways to modify the cradle to have a lace edge so you have lots of options! Let’s get into it!
Modifying the Powerbar for Lace
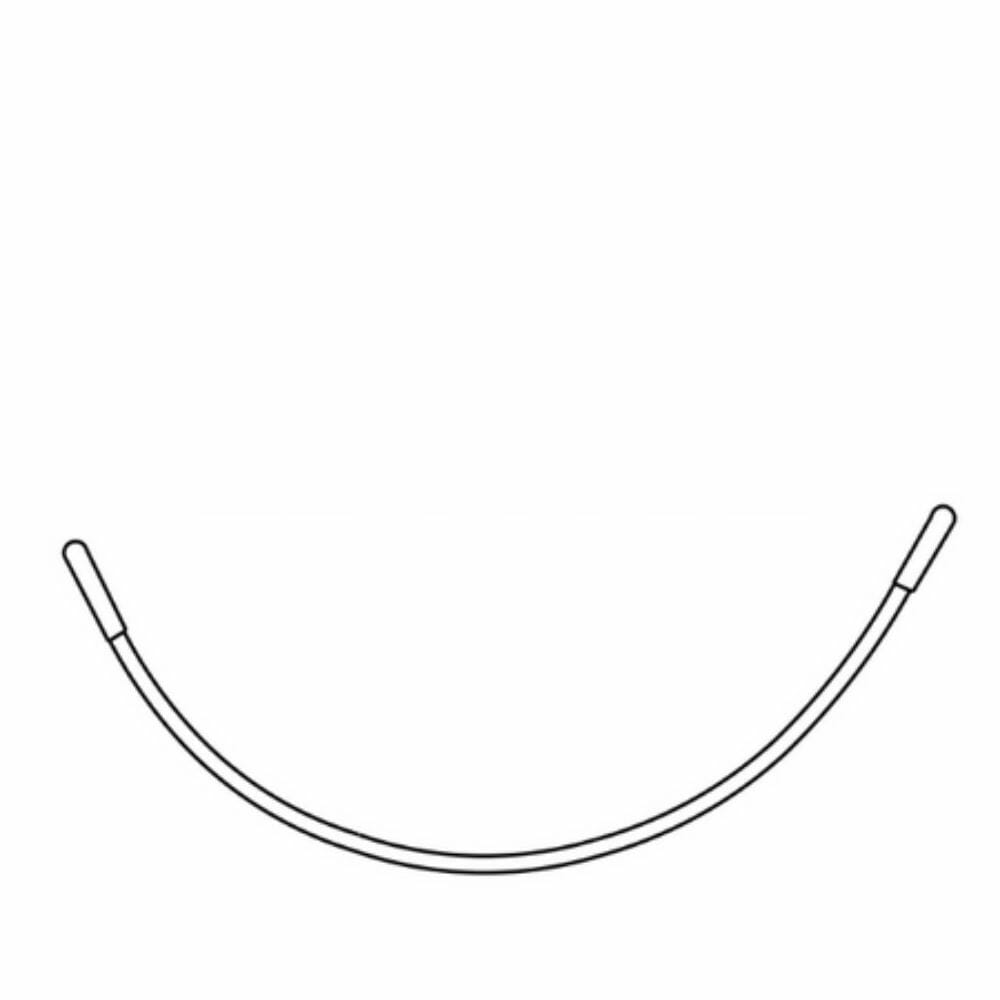
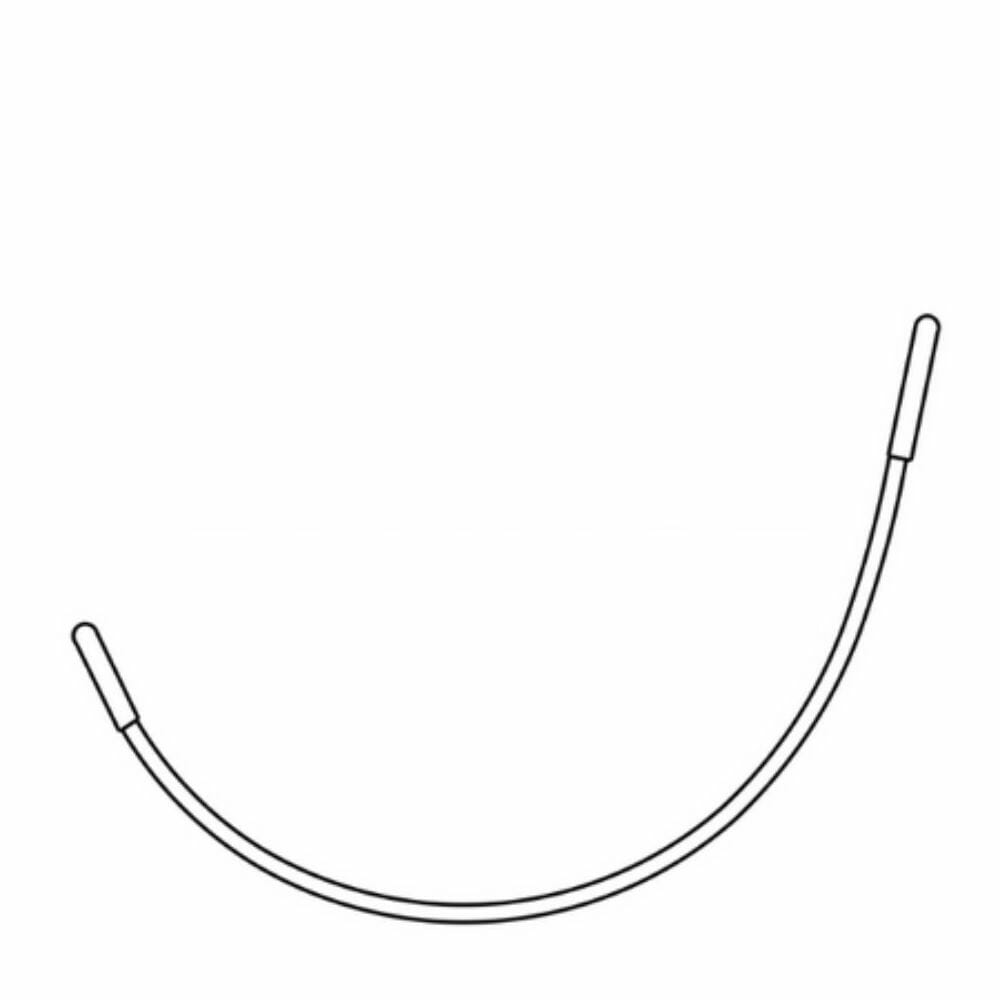
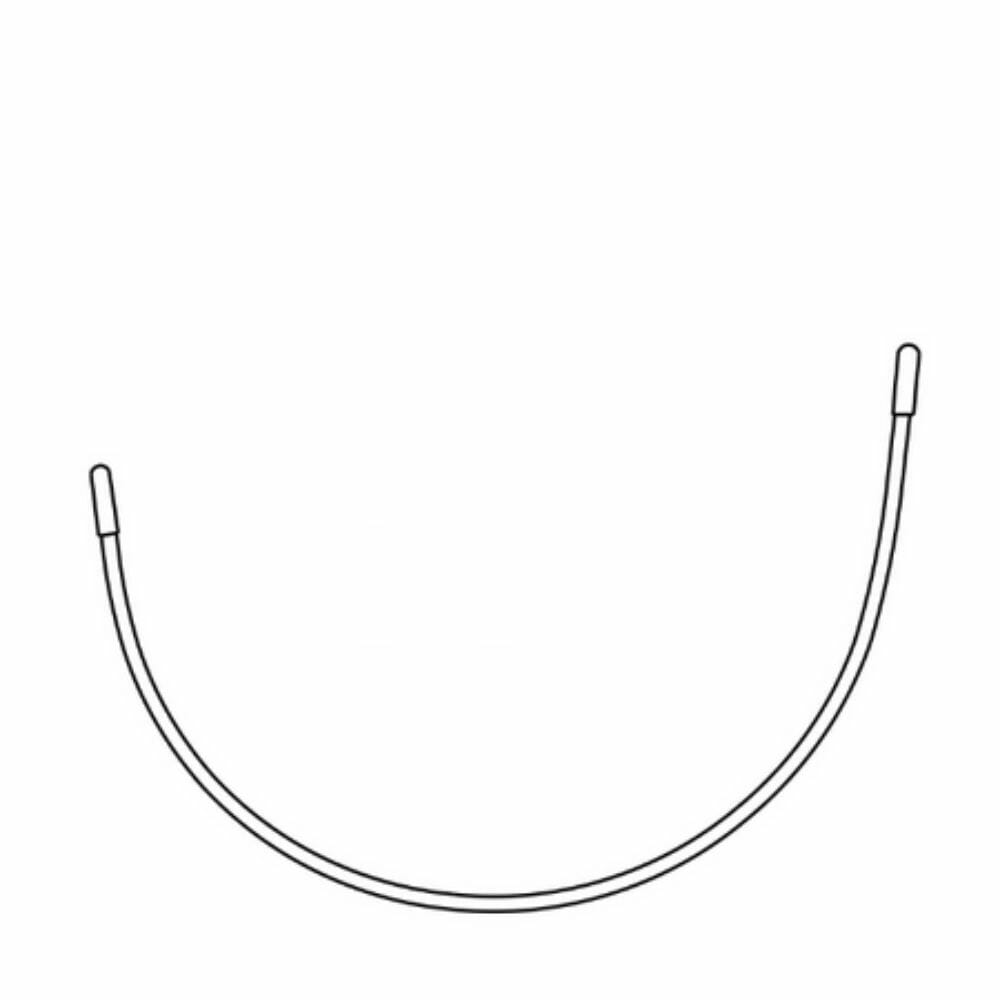
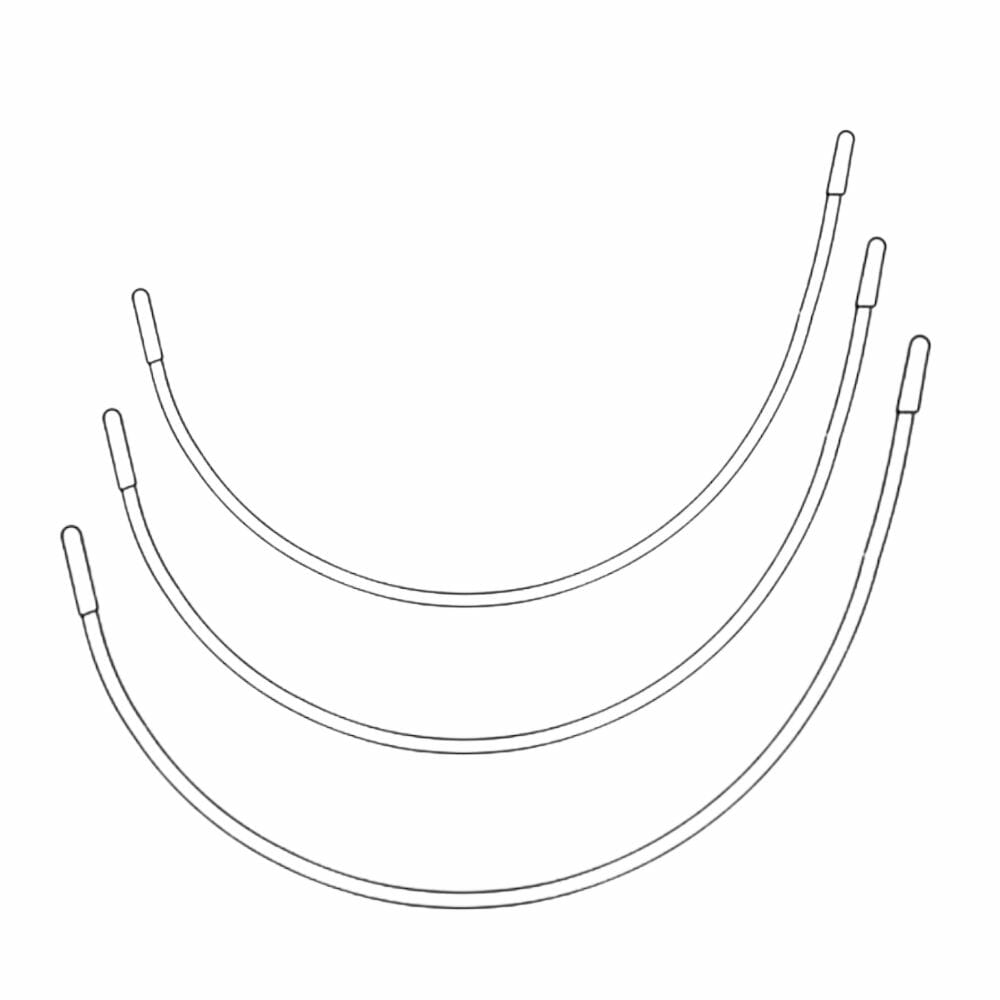
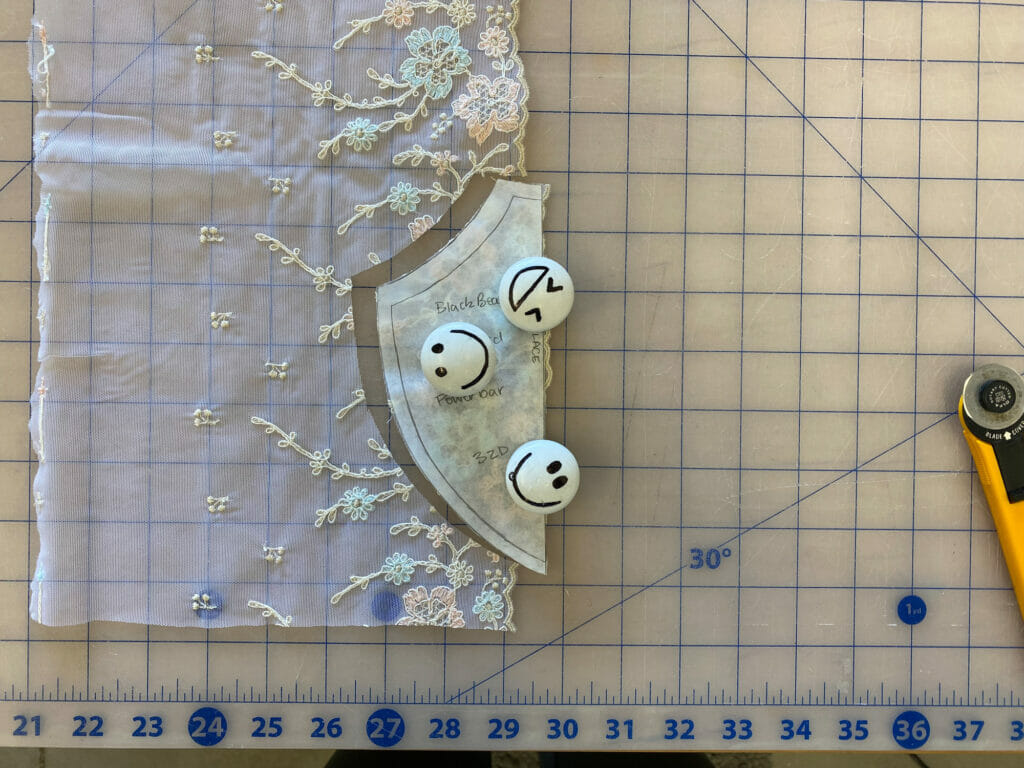
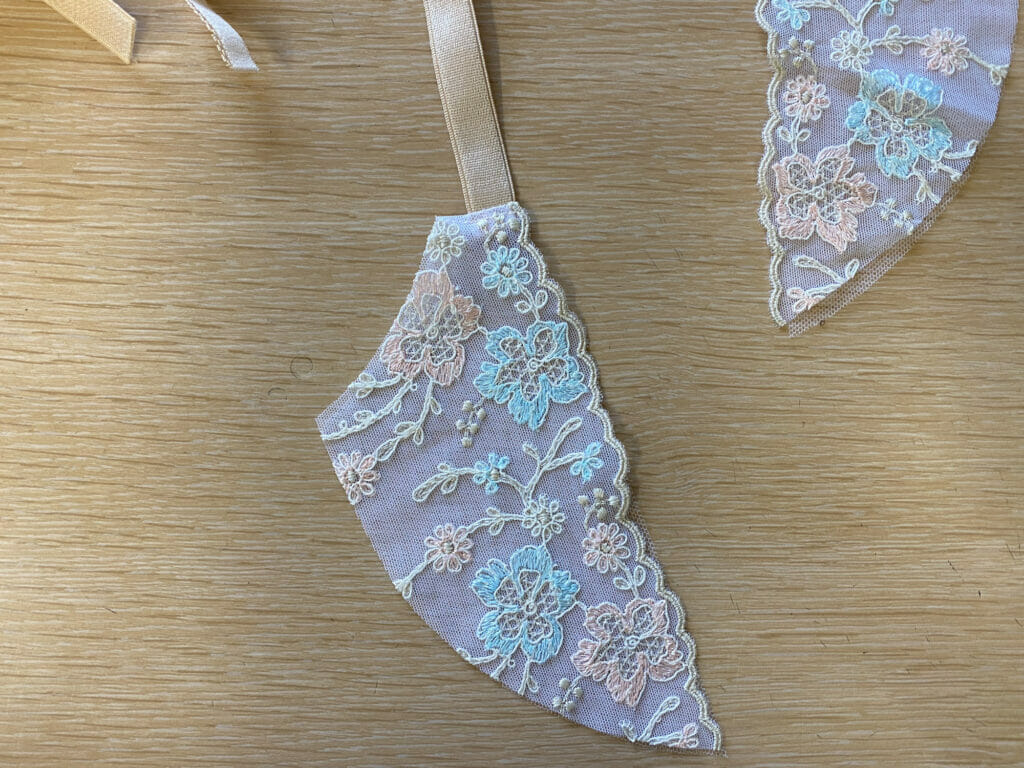
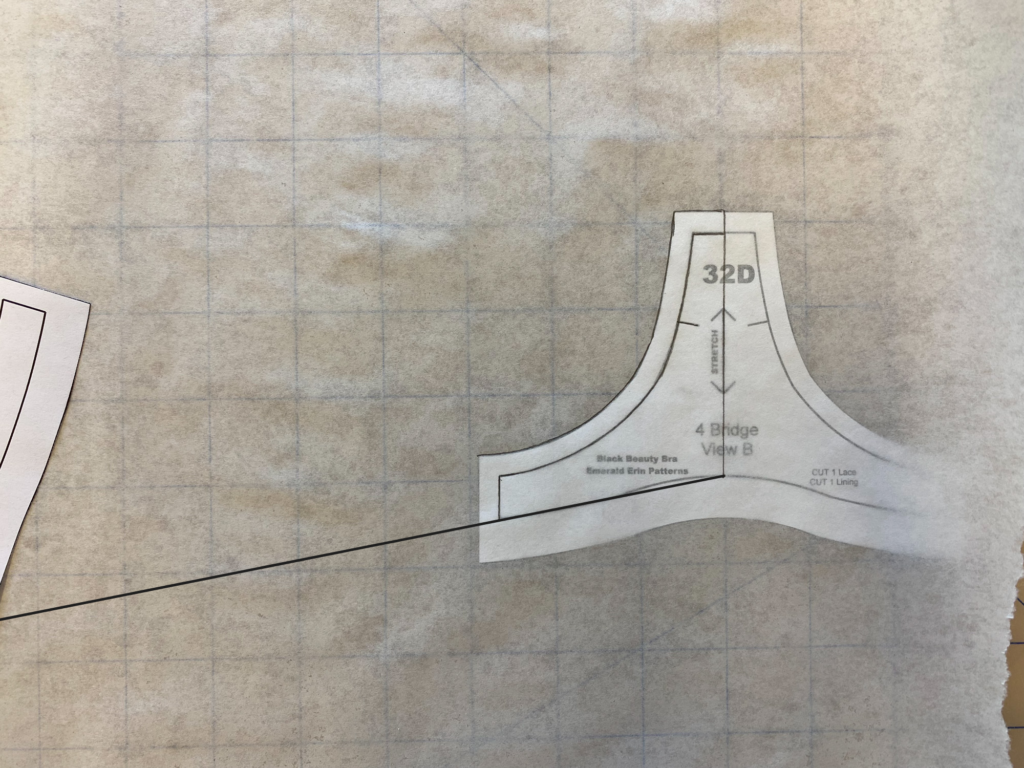
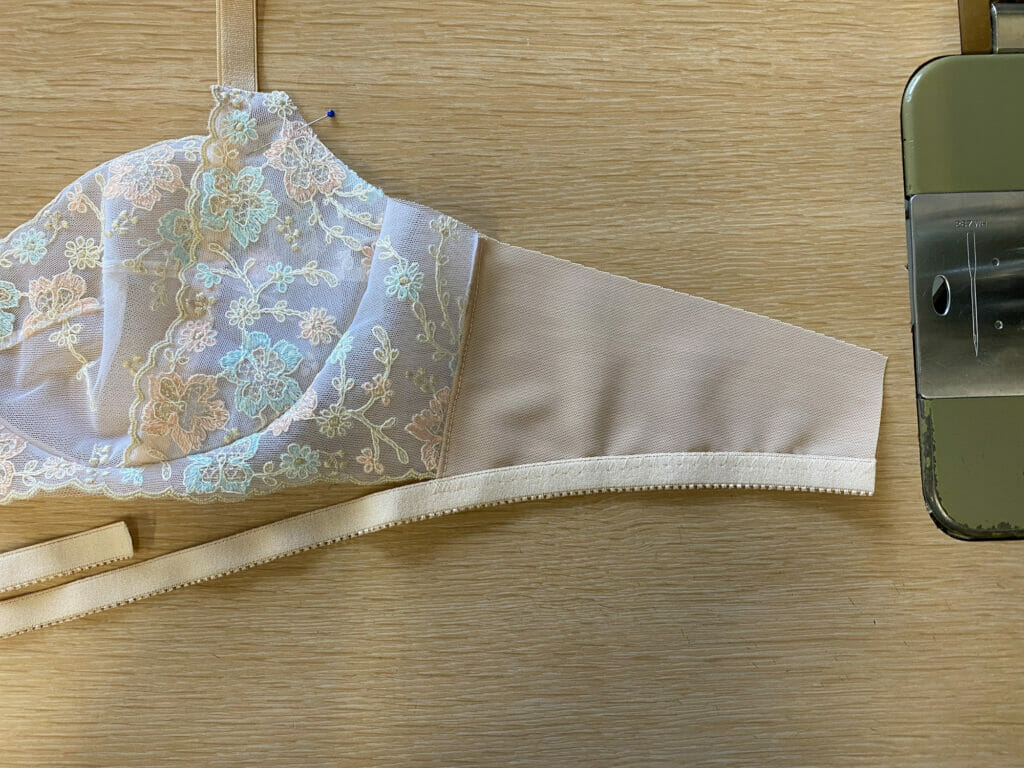
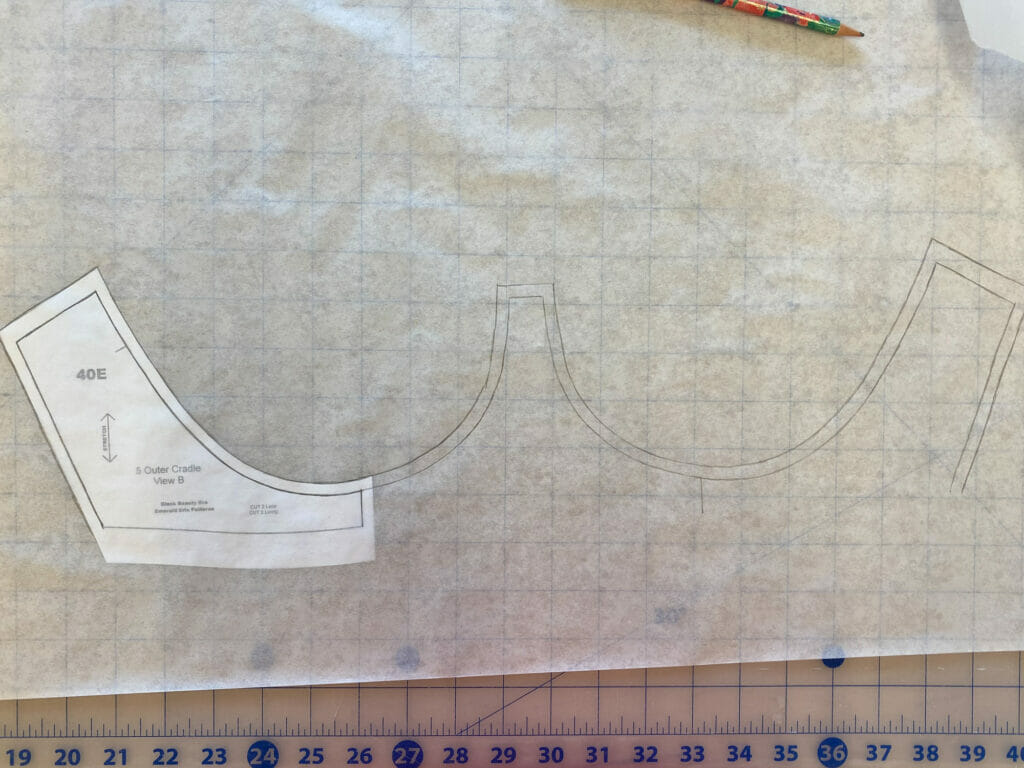
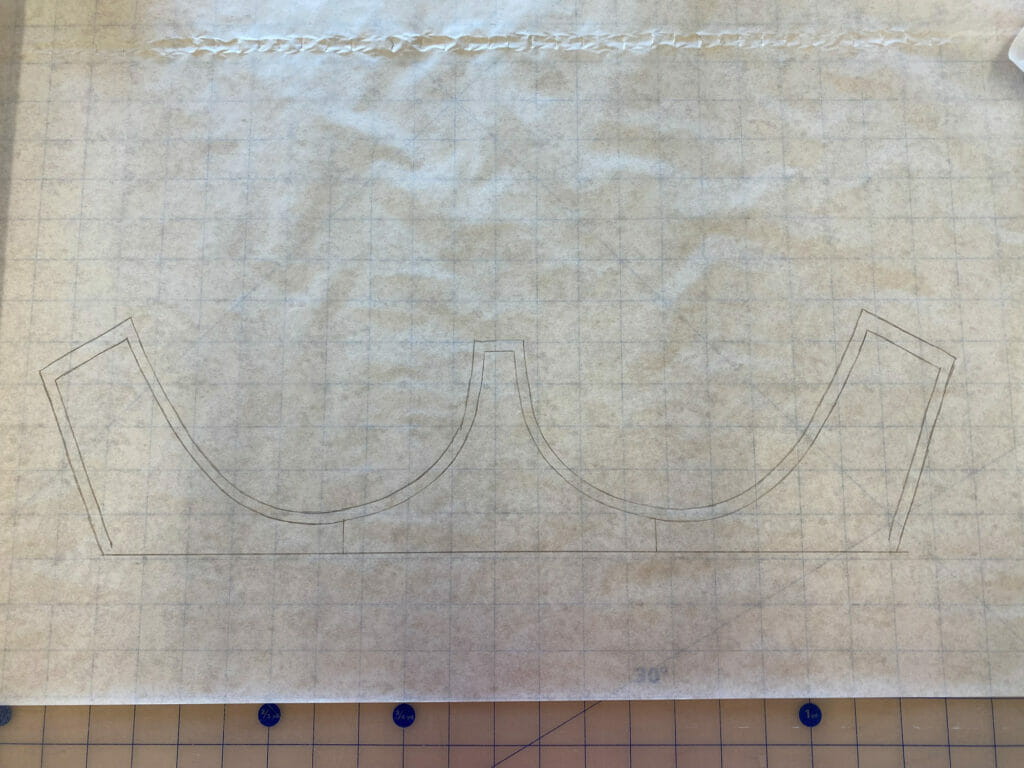
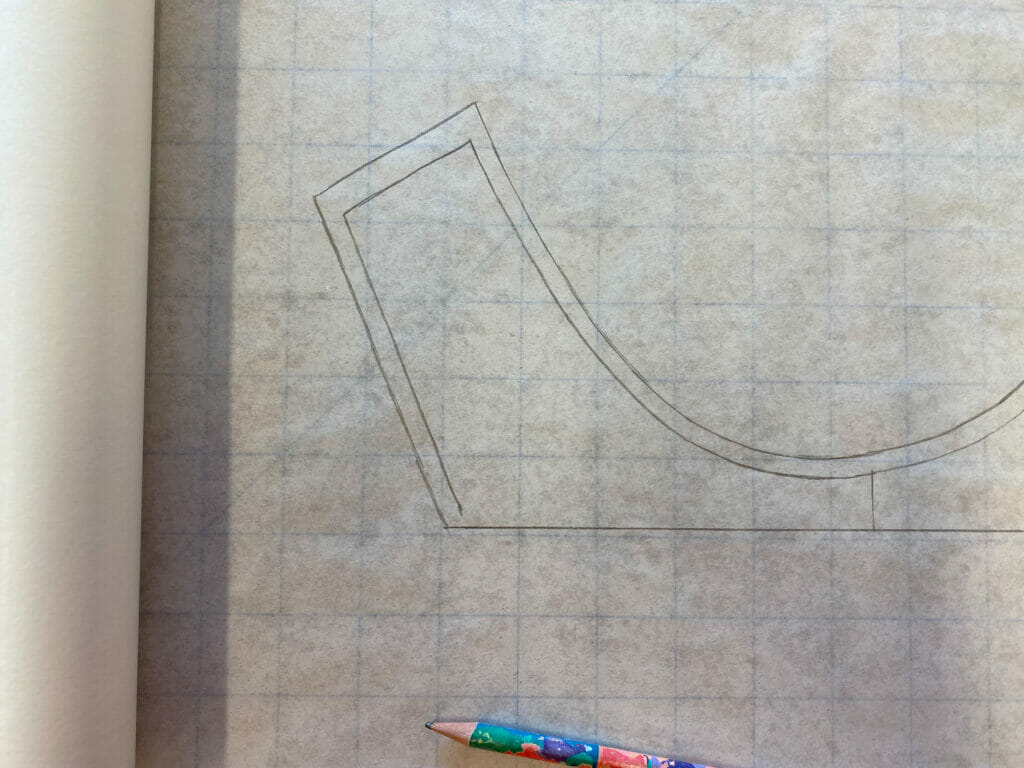
Let’s start with the most simple piece to modify- the powerbar. For any alteration where you want to use a lace edge, the main thing to remember is that you need to make the lace edge on your pattern piece a straight line to follow the edge of the lace.
The Pattern Modifications
For the powerbar, you want to make the inside curved edge of the powerbar a straight line by connecting the bottom point of the powerbar to the top where the strap attaches. You don’t need an elastic allowance for a lace edge, so use the seamlines to make your alterations, then you can trace the rest of the pattern pieces with the normal seam and elastic allowances. This is the whole pattern alteration – easy peasy!
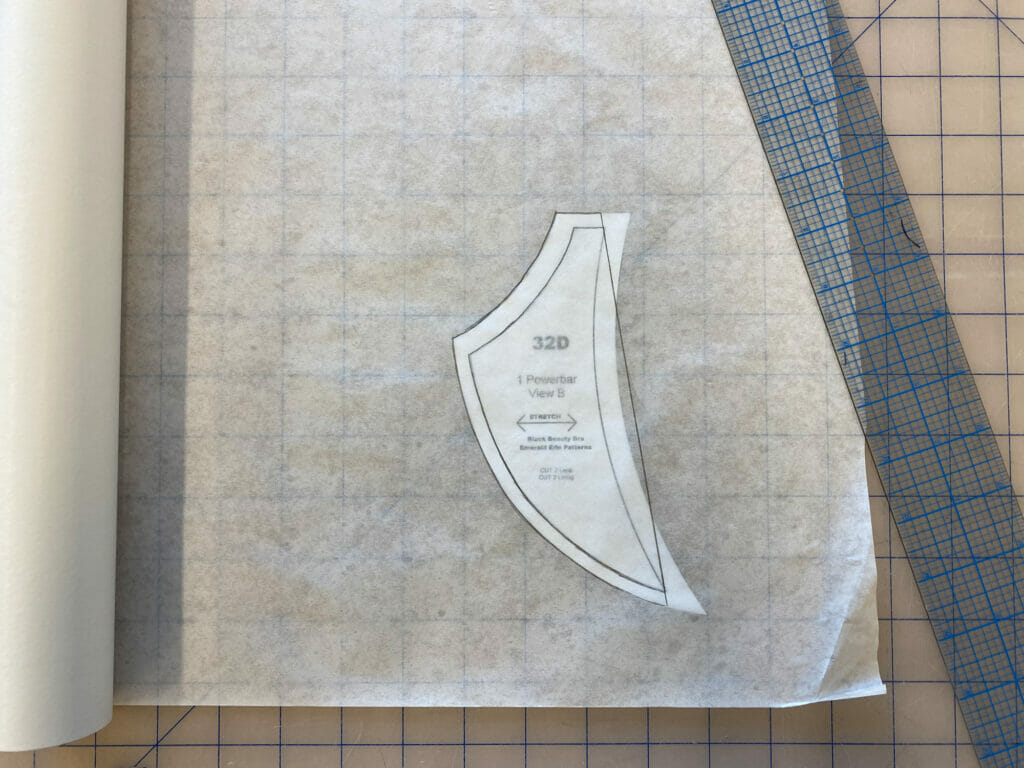
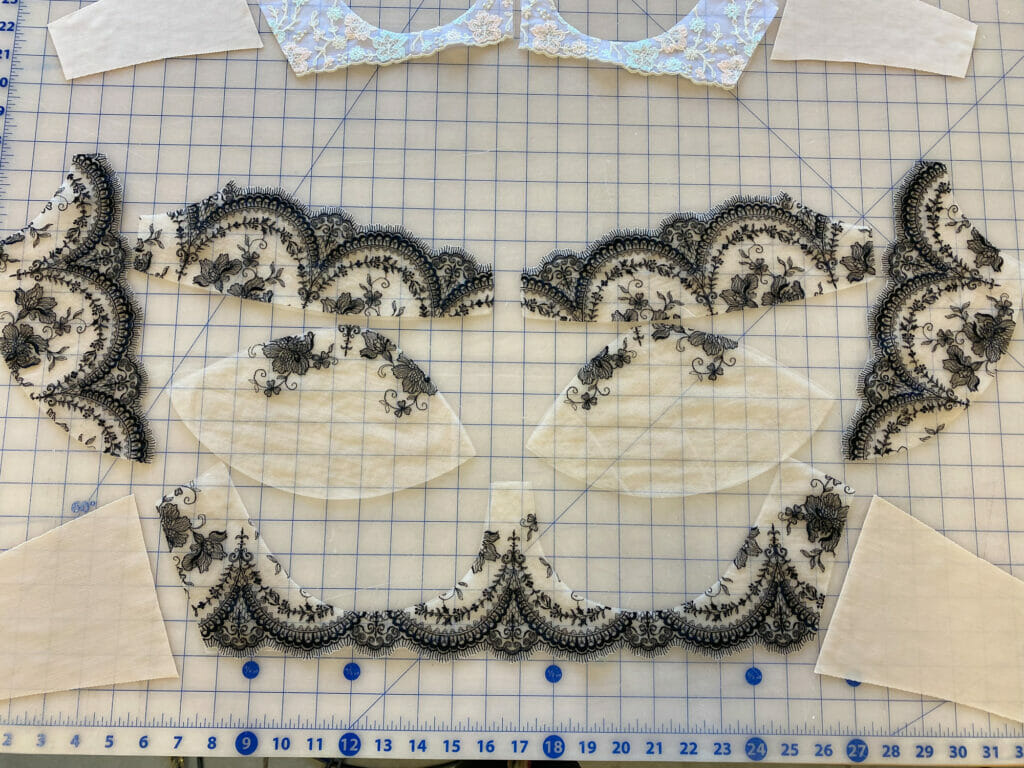
Then when you cut our your piece, place this new straight edge along the edge of your lace so the lowest points of your lace are along the line with the scallops showing over the edge. Cut your lining with this same pattern piece.
The Sewing Modifications
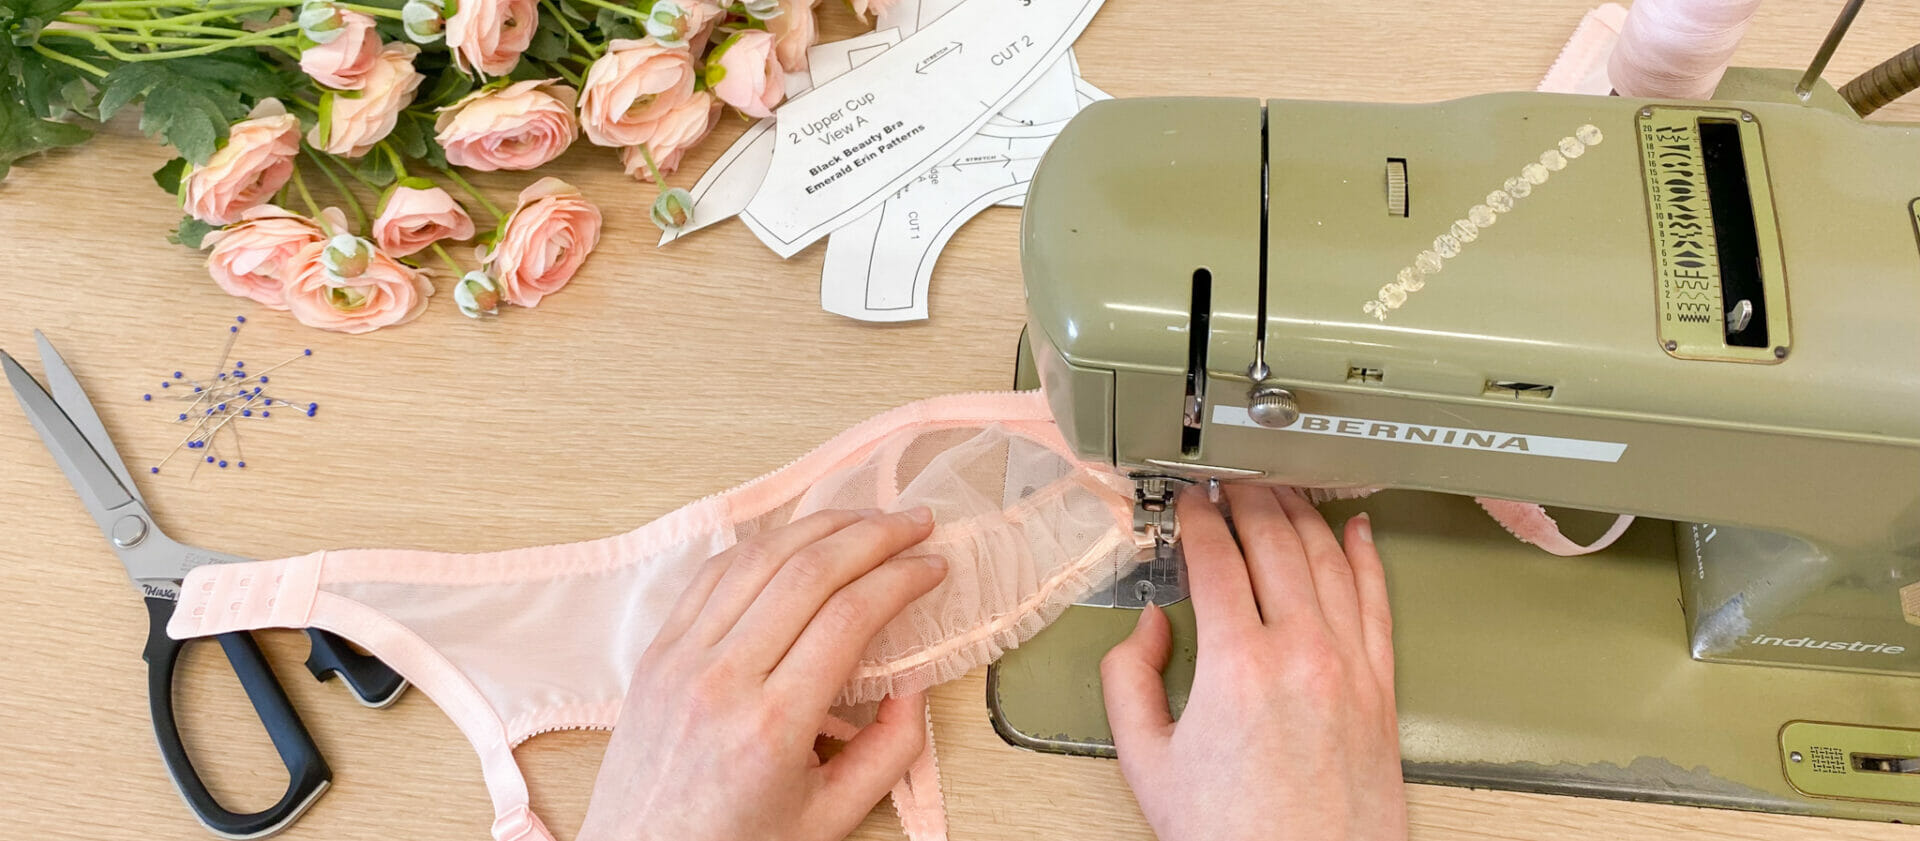
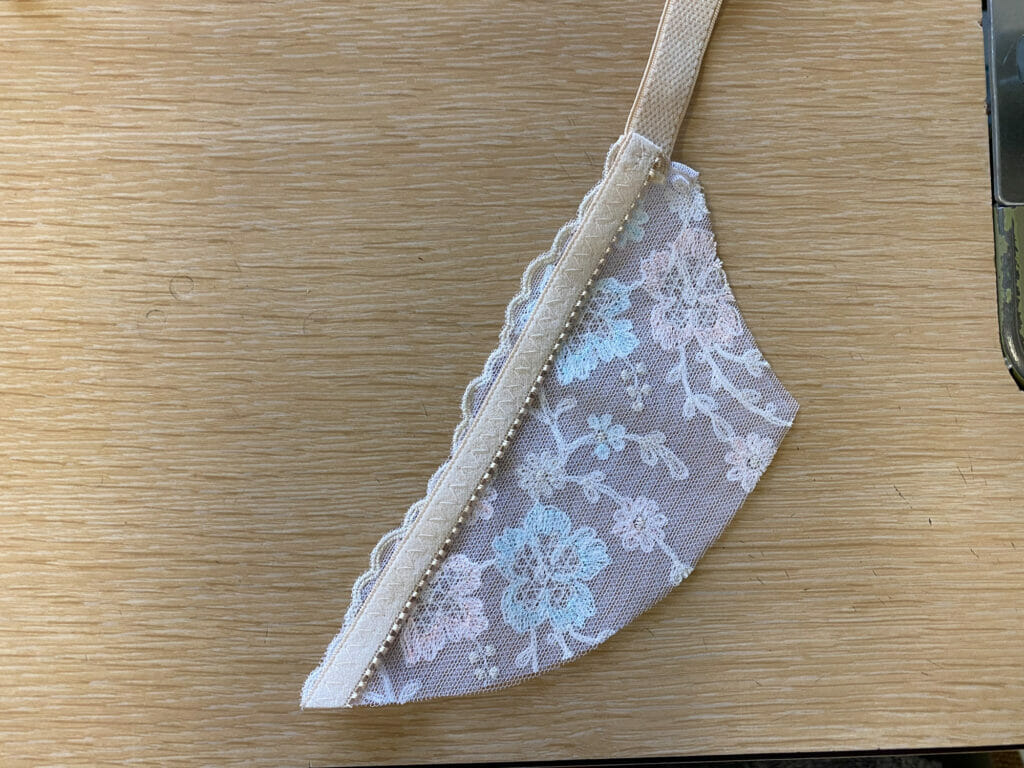
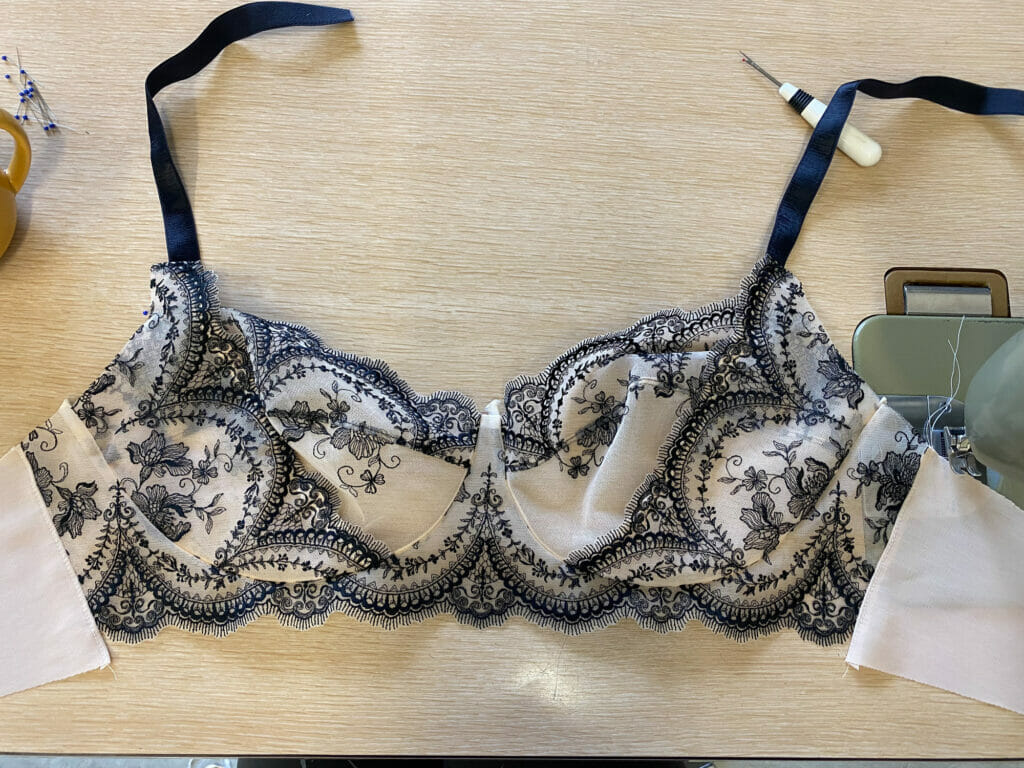
The first step to sewing the powerbar is very similar to the regular instructions, only there is no elastic allowance on the inside edge of the powerbar where the lace is, so you don’t have to leave space on that edge, instead sew the strap all the way to the edge of the lace.
When applying the elastic, instead of the usual picot elastic application in the instructions, all you need to do is lay your elastic along the edge of the lace and stitch it down flat with a zig-zag stitch. I use a single zig-zag for this 3/8″ (9mm) picot elastic, but you can do two smaller zig-zag stitches on each edge of the elastic if you prefer. There are two things to pay attention to when you do this: 1. Make sure you overlap your picot elastic with the strap elastic and do a backstitch, so that your two elastics connect and will take on the strain from your straps and it won’t be straining your lace, and 2. I like to sew the elastic with the plush side out but picots facing in (usually the picot edge of the elastic would face out and show over the edge of the fabric) but I don’t like the elastic picot competing with the lace edge, so I like to make them face in for a cleaner look.
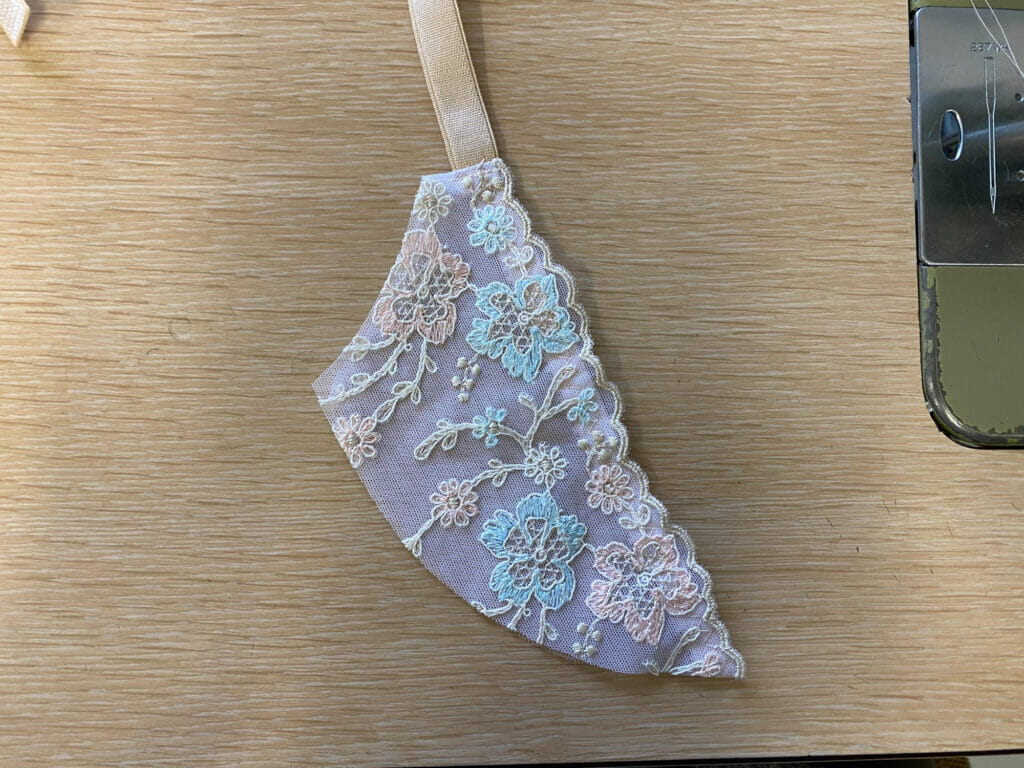
At this point your powerbar is all ready to be basted to your cups and to continue with the bra instructions as usual 🙂
Modifying the Cradle for a Lace Edge
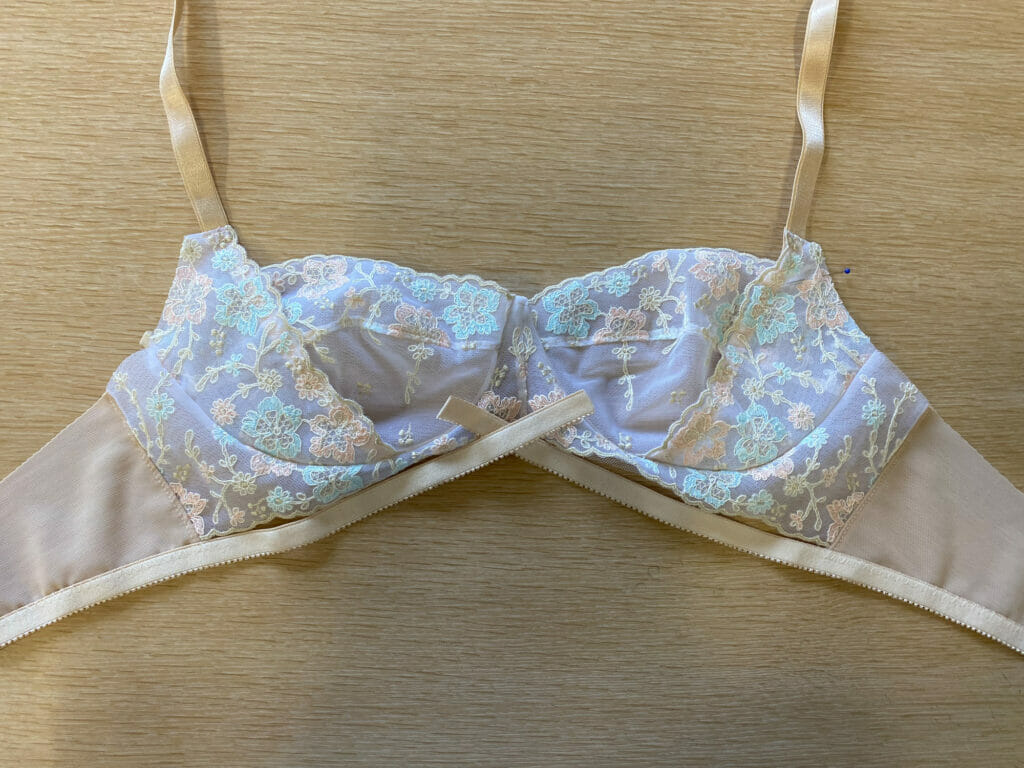
I’m going to show you two ways to do this modification- a two-piece cradle and a one-piece cradle. Both have a beautiful looks and pros and cons to the methods.
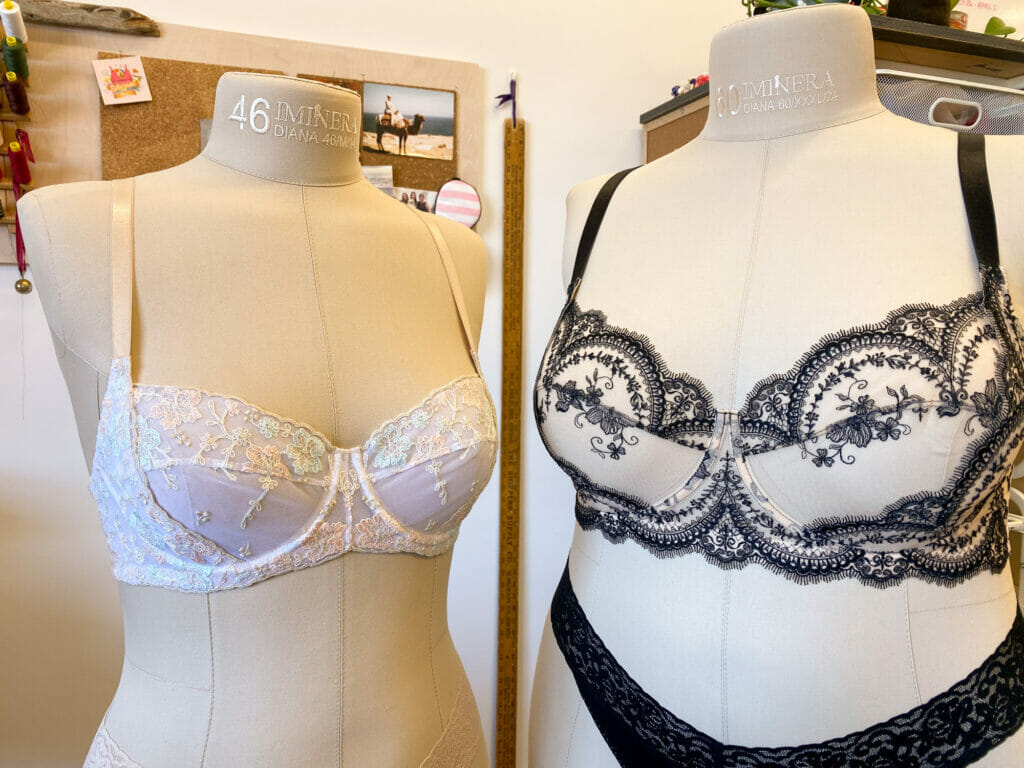
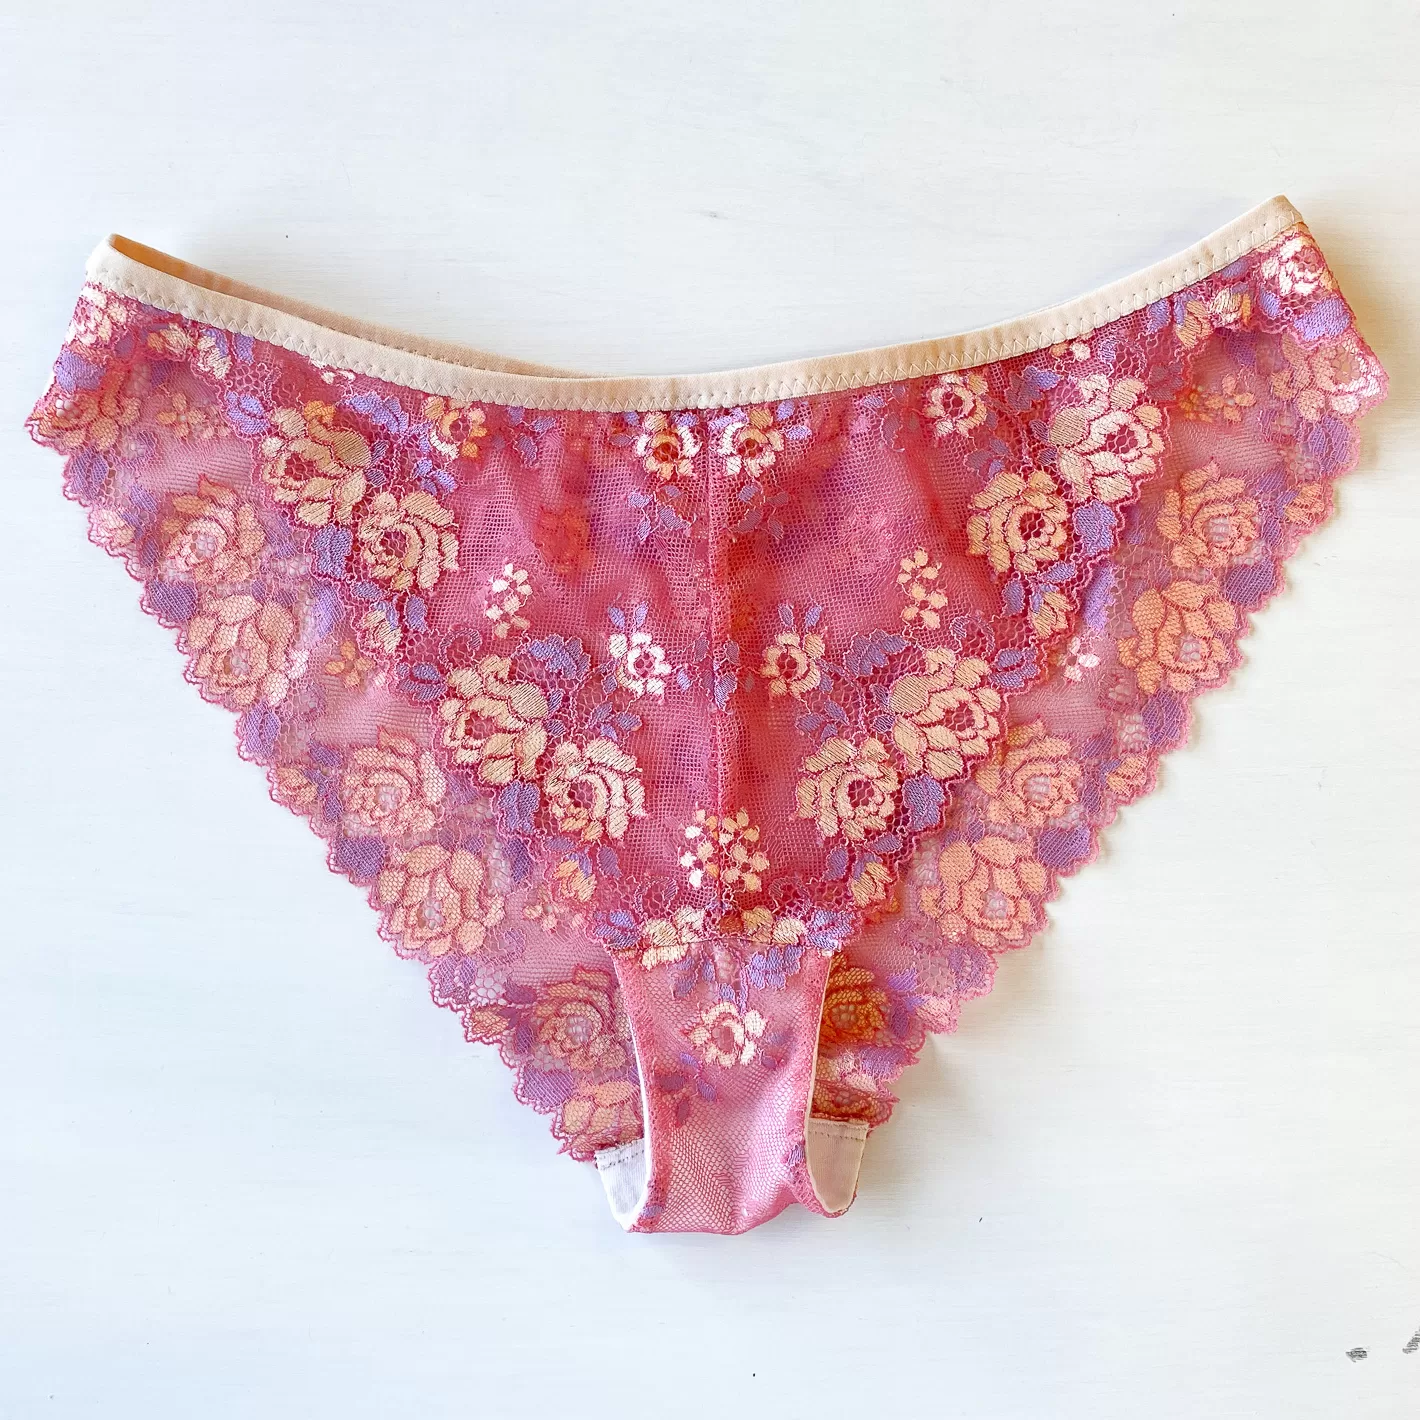
On the left is the two-piece cradle which, as the name implies, is in 2 pieces with a center front seam. On the right is the one-piece cradle which is cut in one piece.
Two-Piece Lace Cradle Modification
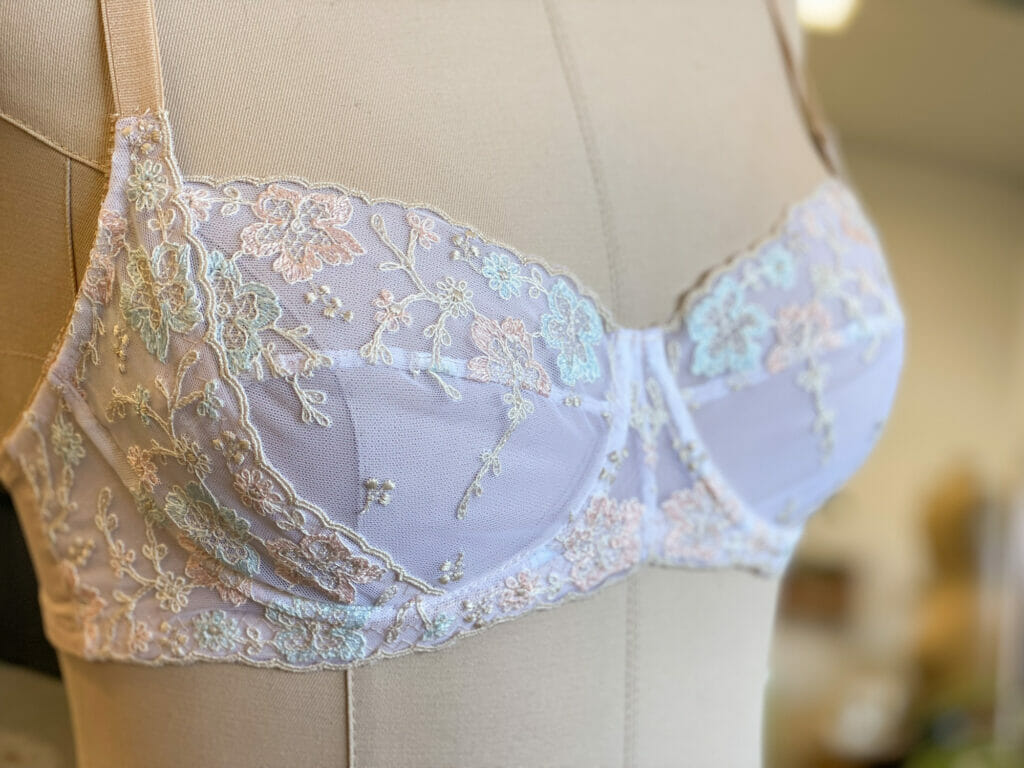
The two-piece cradle is probably my favourite way to make a lace band. Because there is a seam in the center front it’s ideal for mirrored laces and having a perfectly symmetrical bra, and it’s also more similar in fit/shape to the regular version of the cradle with the bottom of the bridge following the same upward curve in the center for a more shaped cradle. The only downside is that it does have a seam in the center front which can interrupt a beautiful lace pattern if you’ve got a great pattern placement (like the bra on the right!).
The Pattern Modifications
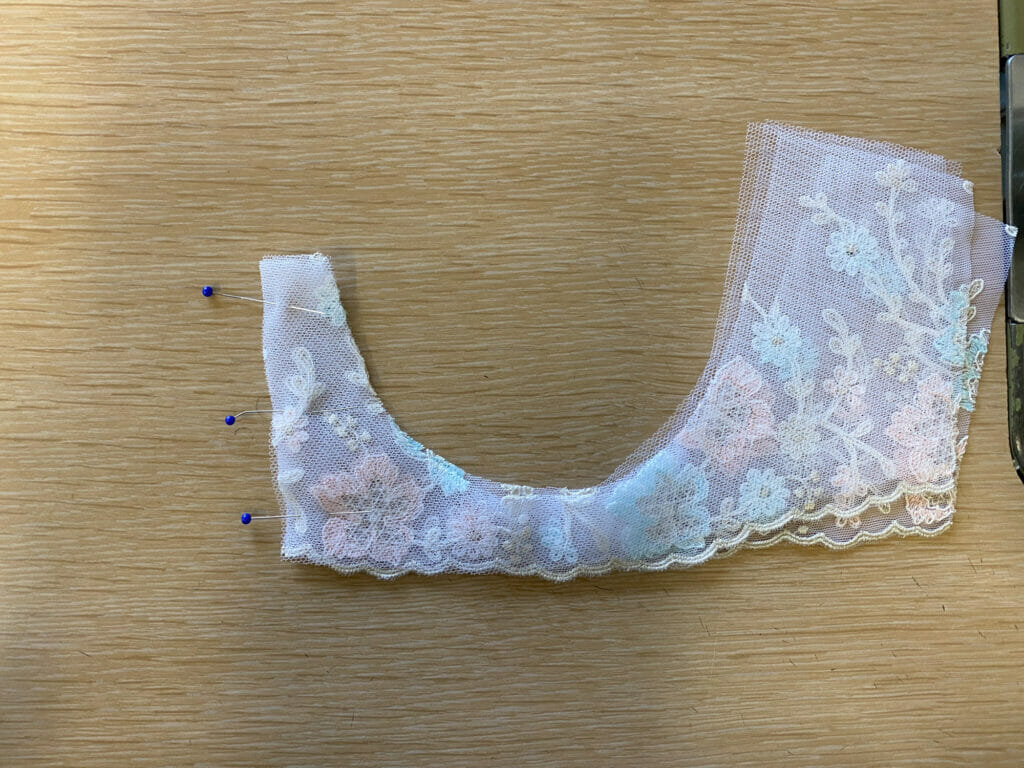
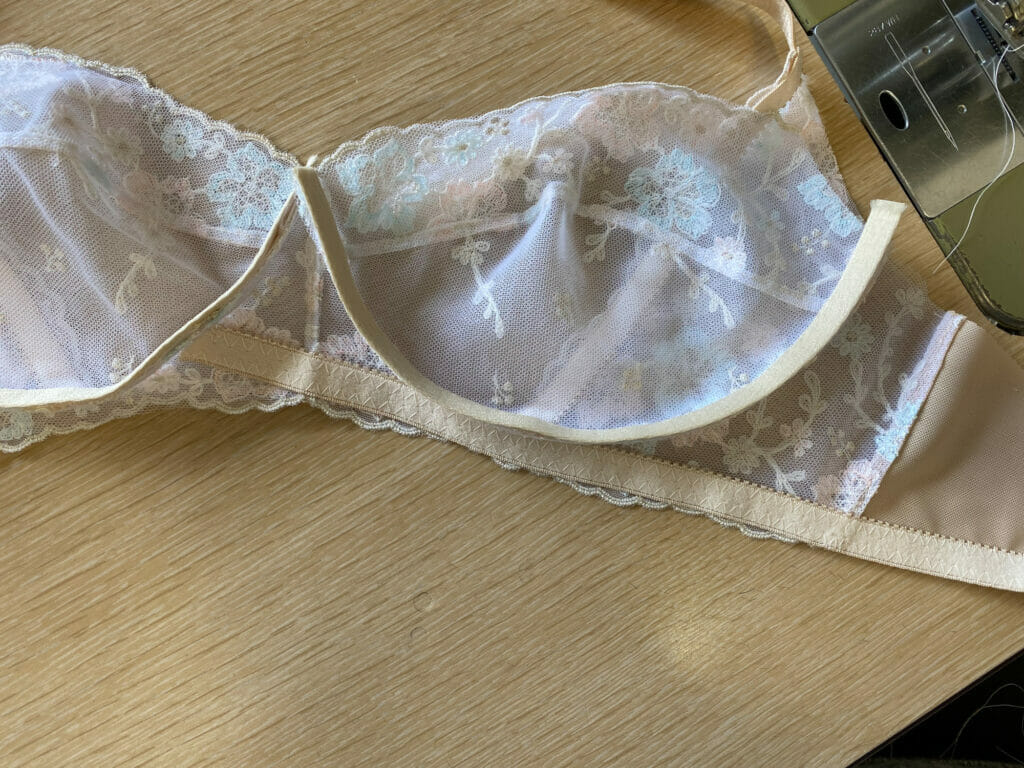
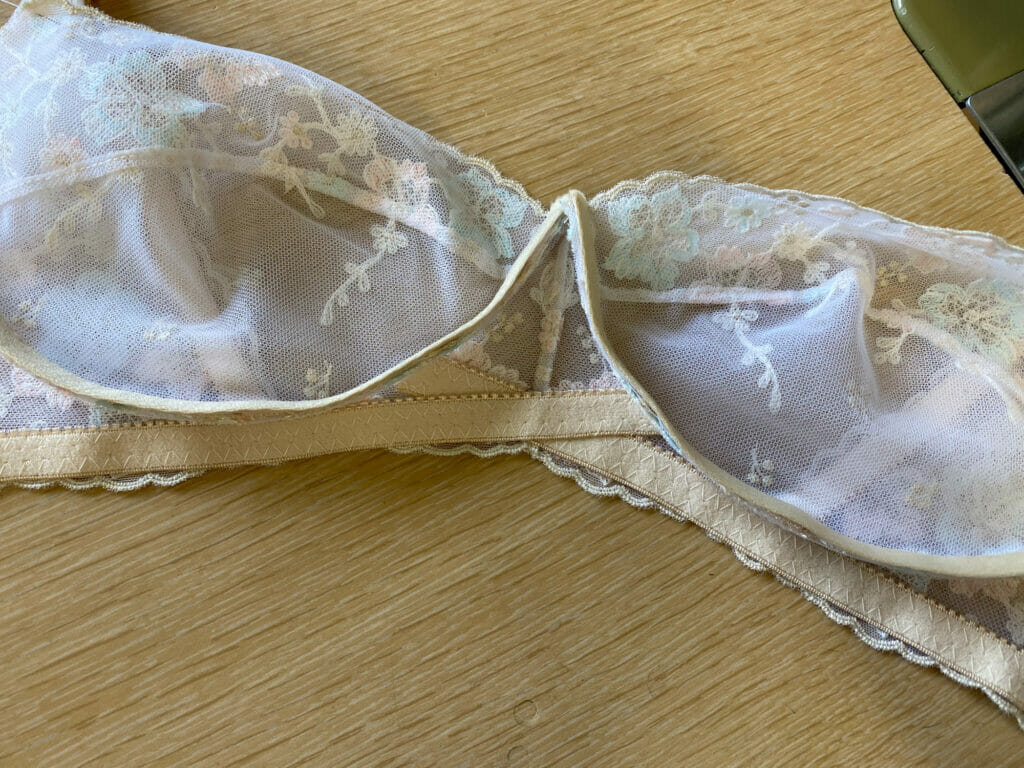
The first step for this alteration is to trace your bridge pattern piece, dividing it vertically in half at the center front (which will become the center front seam), trace the top of the bridge, inside curve and the center bottom seam, stopping where the elastic allowance starts.Then draw a straight line connecting the bottom the two bottom points (the center bottom of the bridge and the bottom of the cradle seam), and continue this straight line past the center bottom seam to make the bottom line of the cradle and to show how to place your outer cradle piece.
To place your outer cradle piece make sure that it is connected at the top of the cradle seam, and then pivot the piece until the bottom of the side seam lines up with your new straight line bottom edge of the cradle. This will create a tiny wedge/dart in the cradle seam, and a little peak in the bottom of the underwire curve.
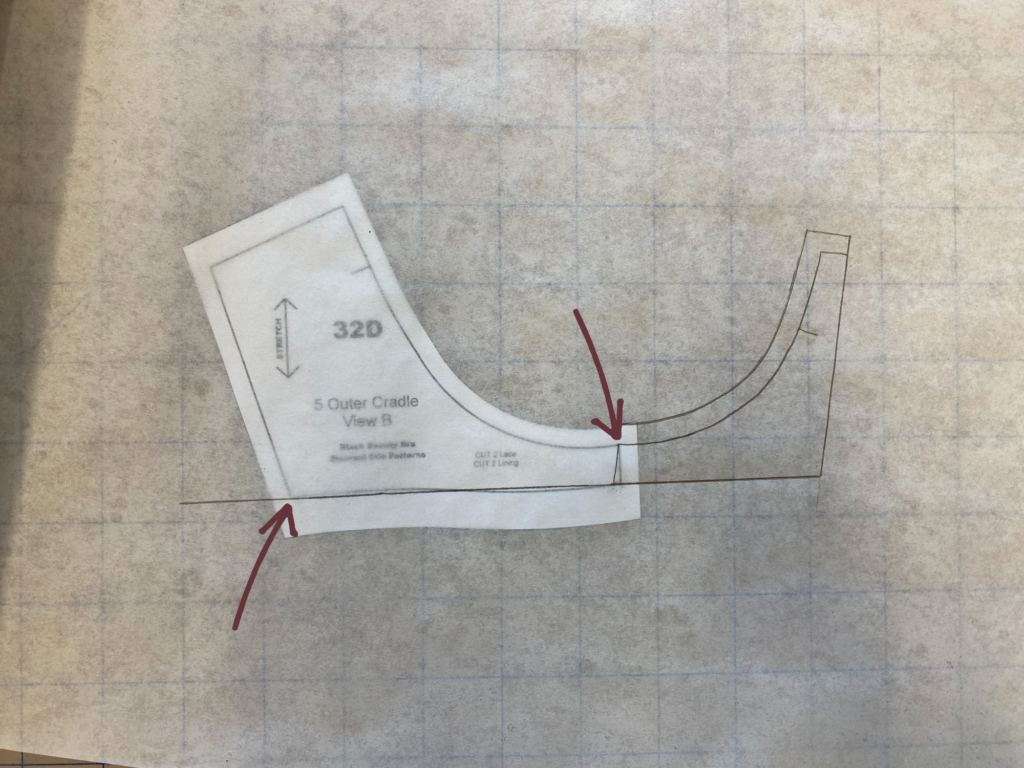
Trace off the the rest of the outer cradle and smooth out the center bottom of the underwire curve so there is no peak

Don’t forget to add a 1/4″ (6mm) seam allowance along the center front seam and to label your pieces 🙂
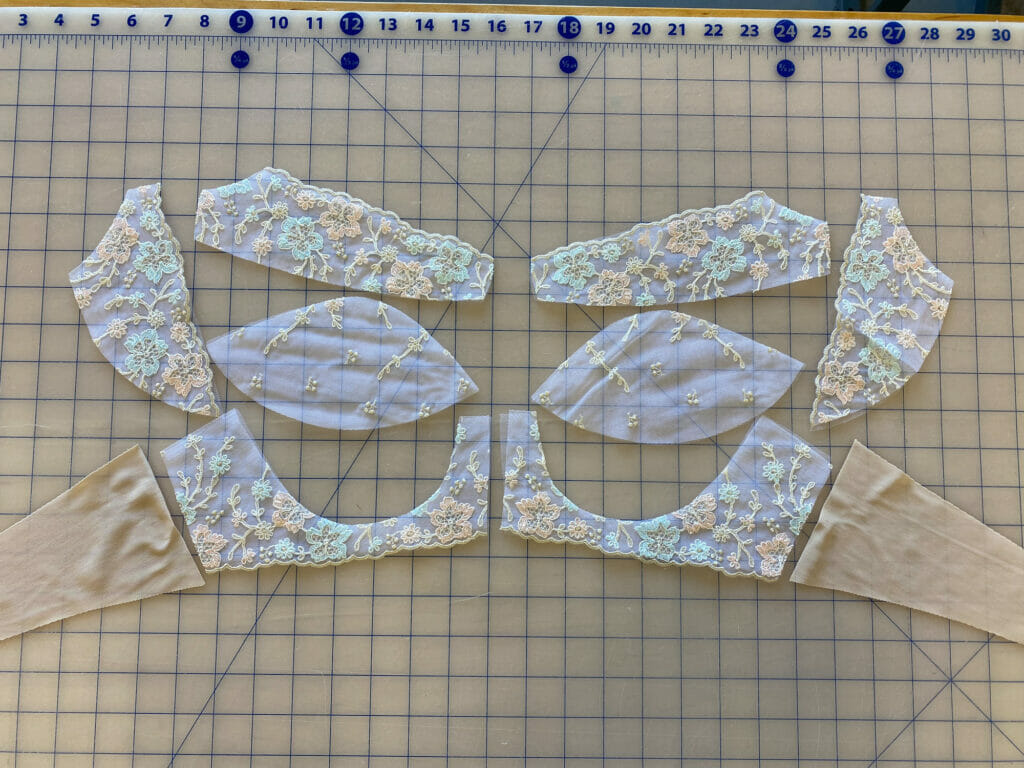
Then you can cut your pieces out of lace and your tulle lining. And the back band pieces will be cut the same as usual with the elastic allowances.
The Sewing Modifications
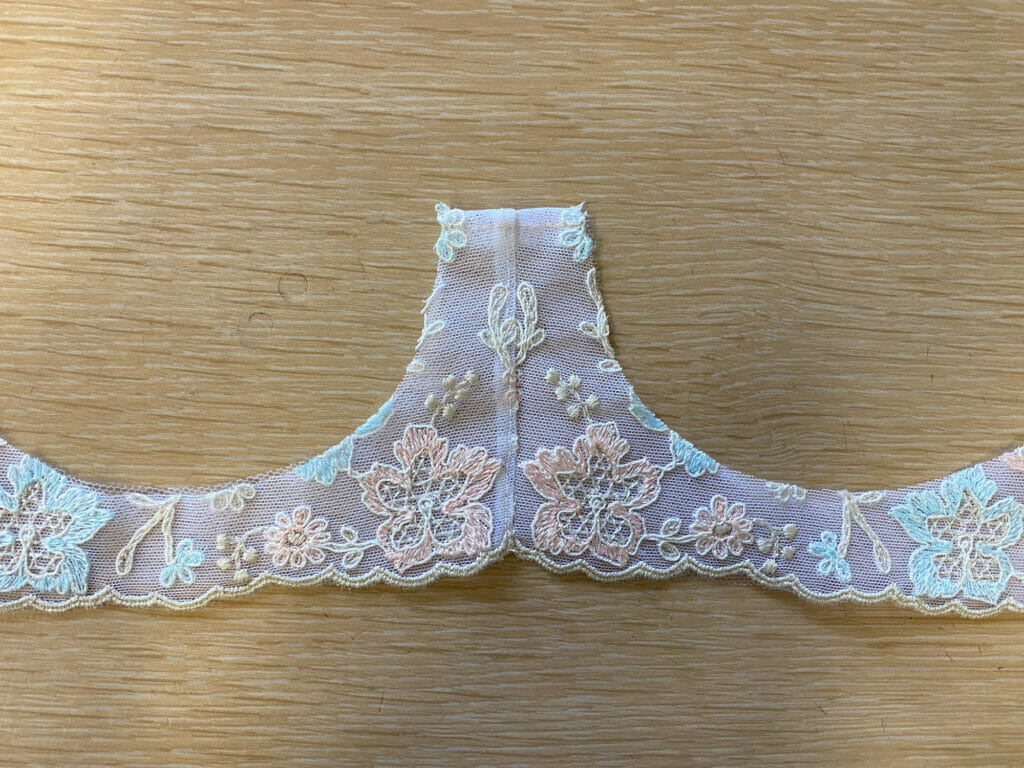
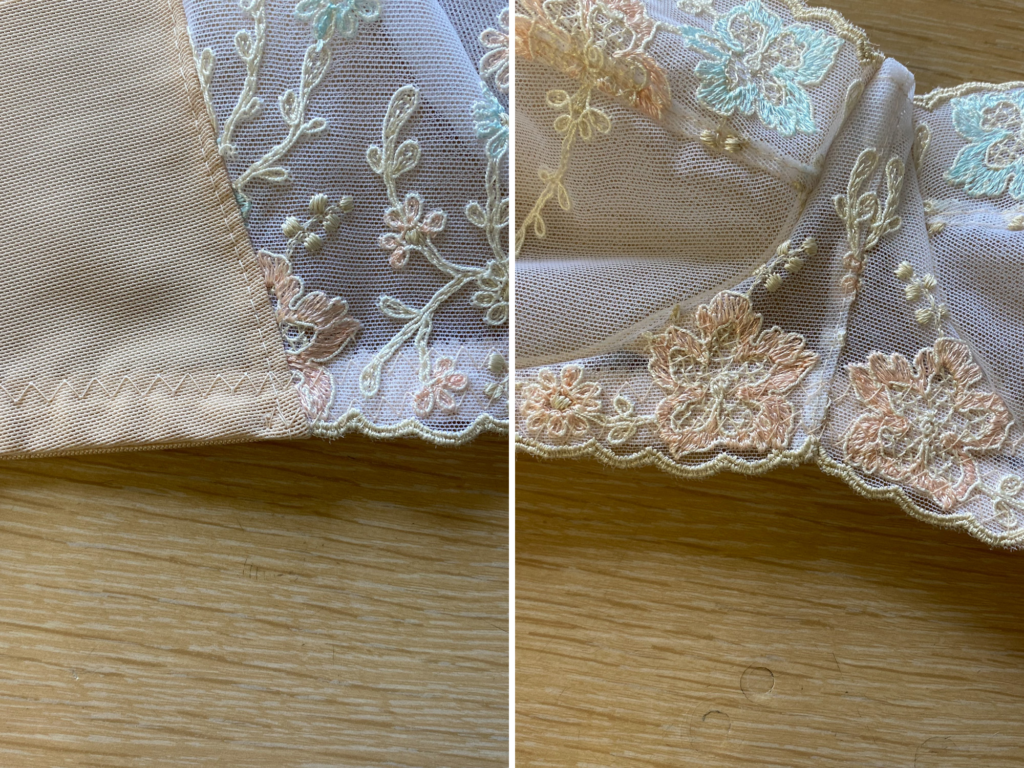
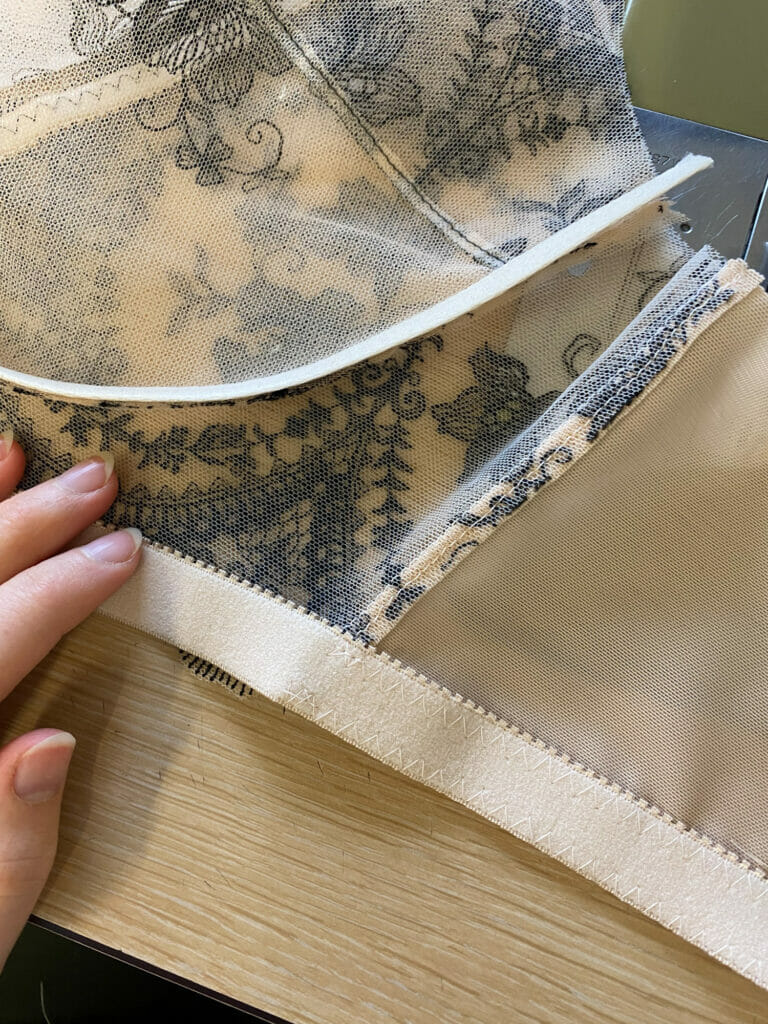
First, to sew the cradle together, you sew right sides together along the center front seam.
Then I like to topstitch the seam allowances to one side, then fold the top edge to back by 1/4″ and topstitch down.
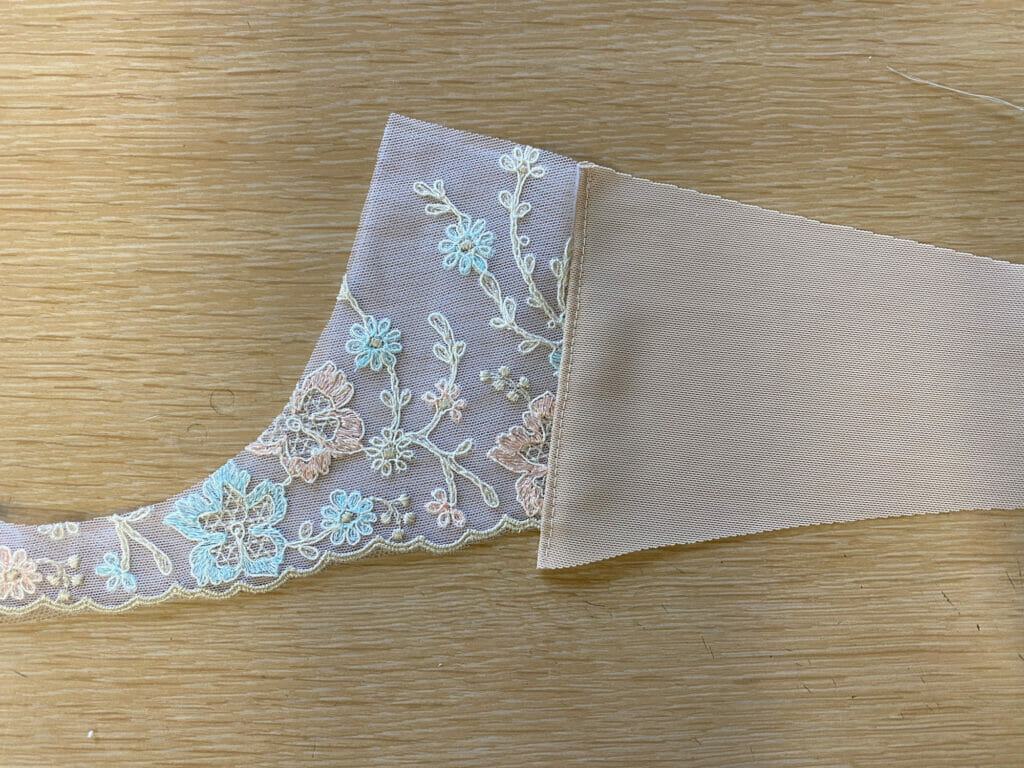
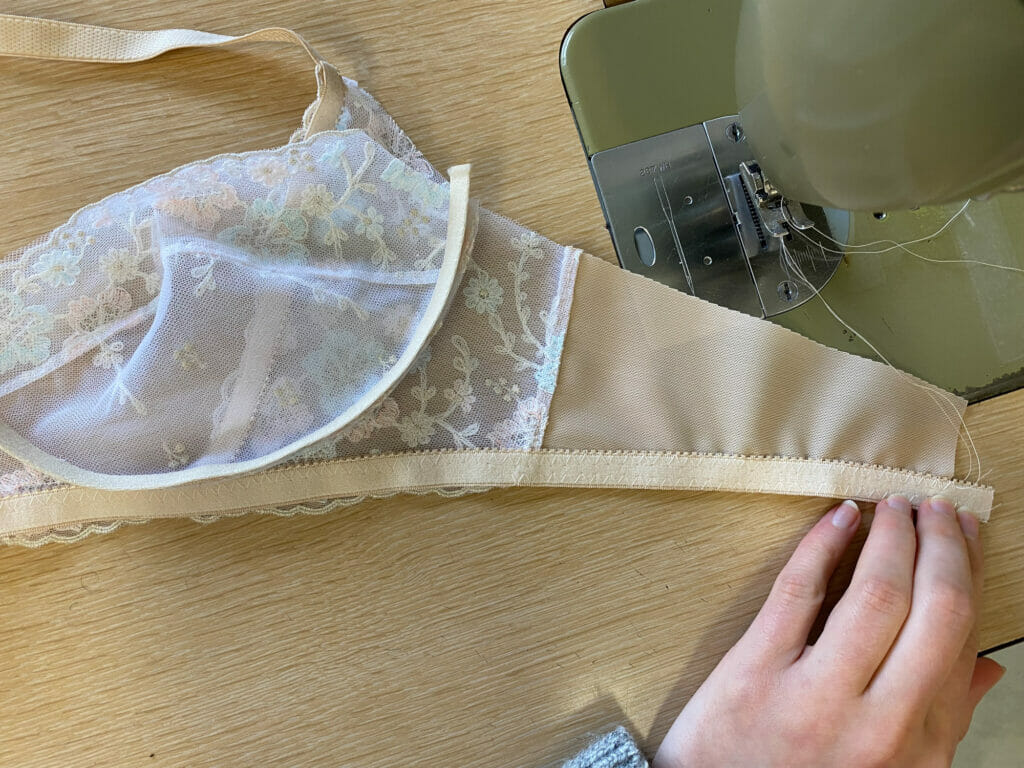
Sewing the cradle to the back band, you’ll notice that the back side seam is longer than the cradle side seam, and that’s because the back band has elastic allowances, so you need to match the seam at the top and leave the excess at the bottom of the seam.
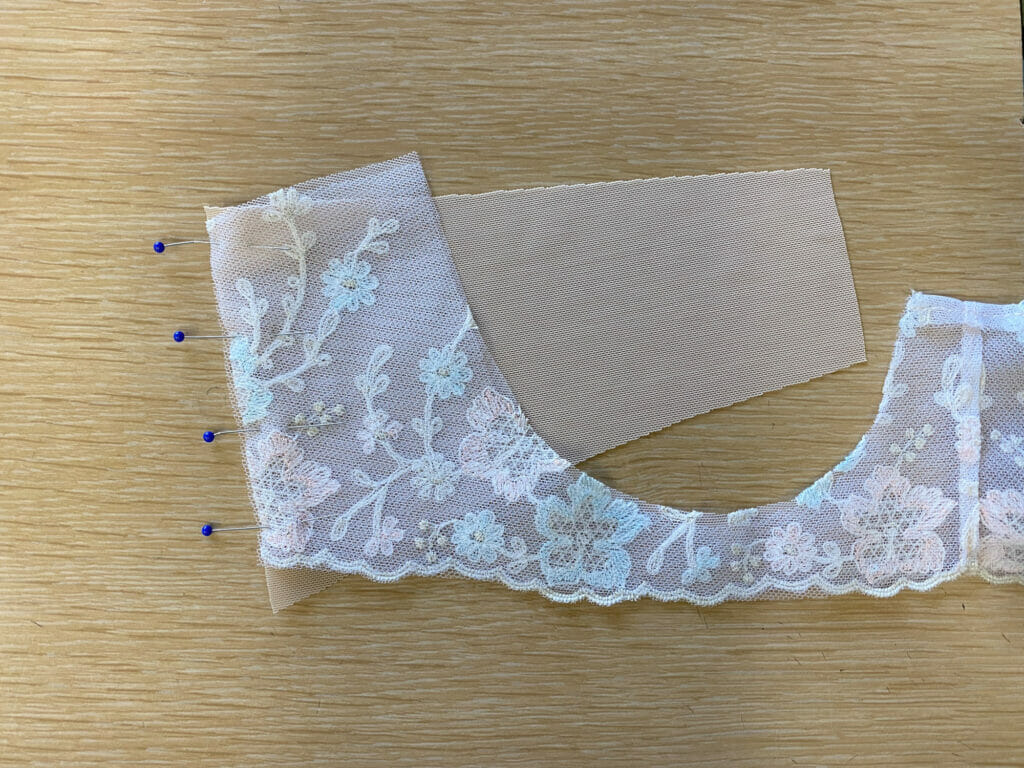
Then I like to topstitch the seam allowances to the back band and you can see the extra length to the back band at the bottom that we need to apply the bottom band elastic.
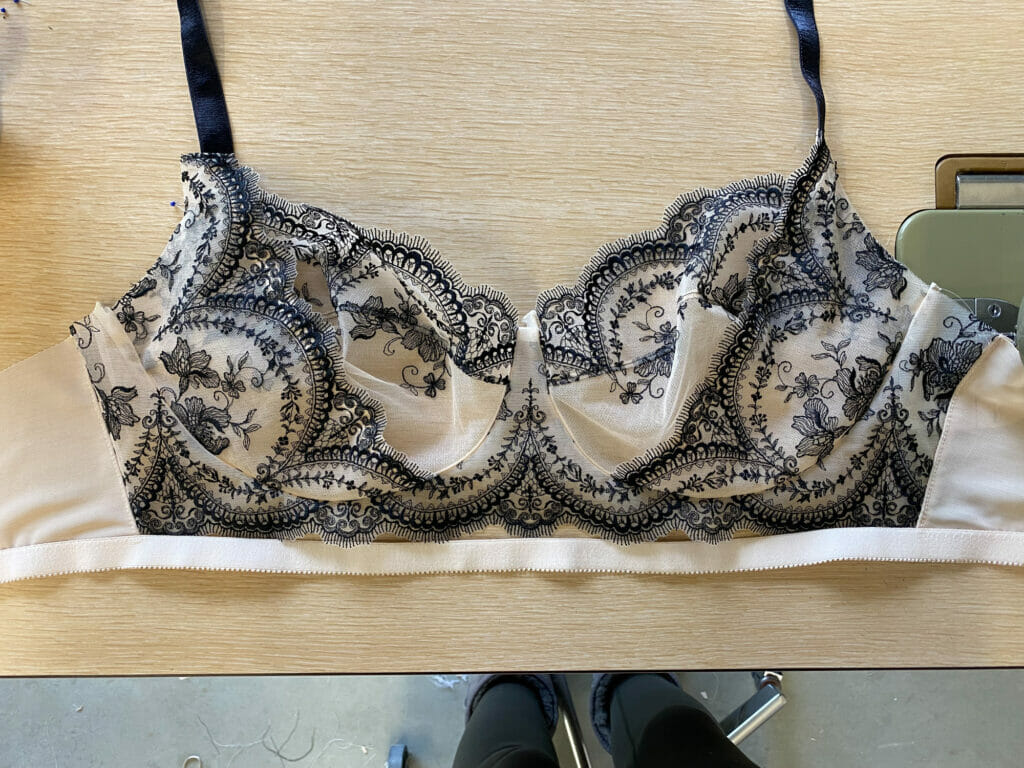
At this point you’ll continue with the instructions as usual and insert the cups into the cradle and apply the first pass of the channeling. Then when it comes to applying the bottom band elastic, here is the modified step:
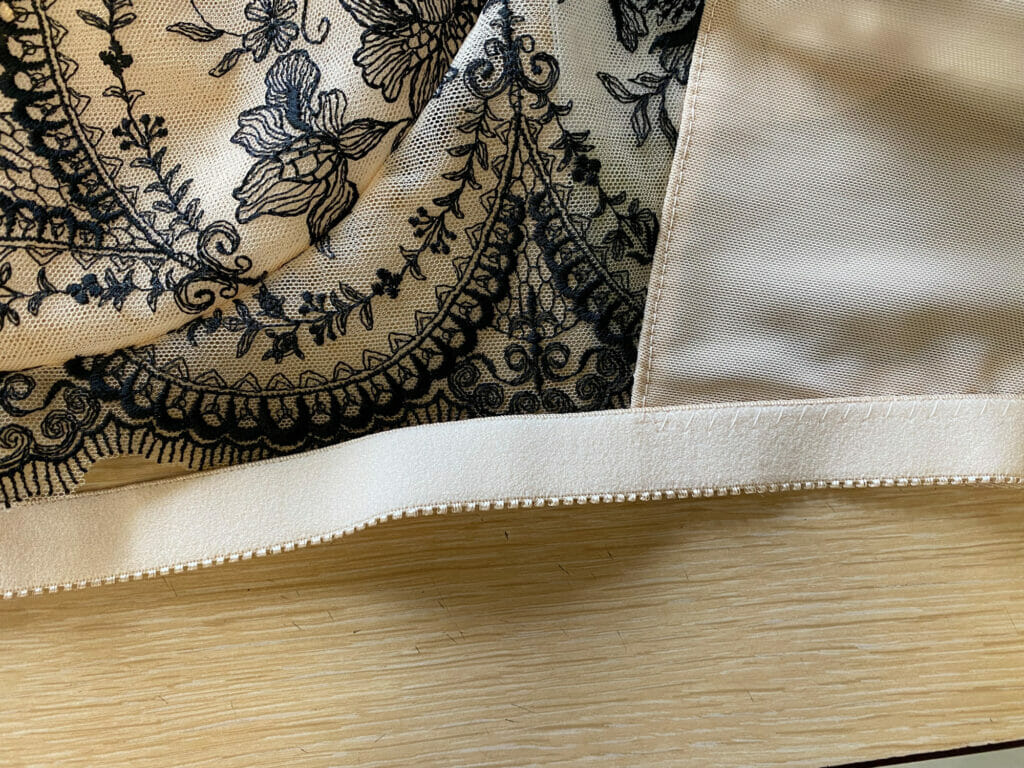
First you’ll stitch the elastic as usual, to the right side of the back band with the plush side up, and this time I’m doing the picots facing the edge so that they’re hidden when it’s flipped to the inside. When you get the side seam make sure that the edge of your elastic meets the point where your lace meets the back band and backstitch.
Then measure out your bottom band elastic along your cradle unit it reaches the opposite cup and cut it. Do this on both sides so you have two pieces of elastic that will cross in the center front. At this stage you don’t have to cut your elastic to an exact length, just make sure that it’s long enough to be caught in the channeling of the opposite cup, you can cut it down to the perfect length later.
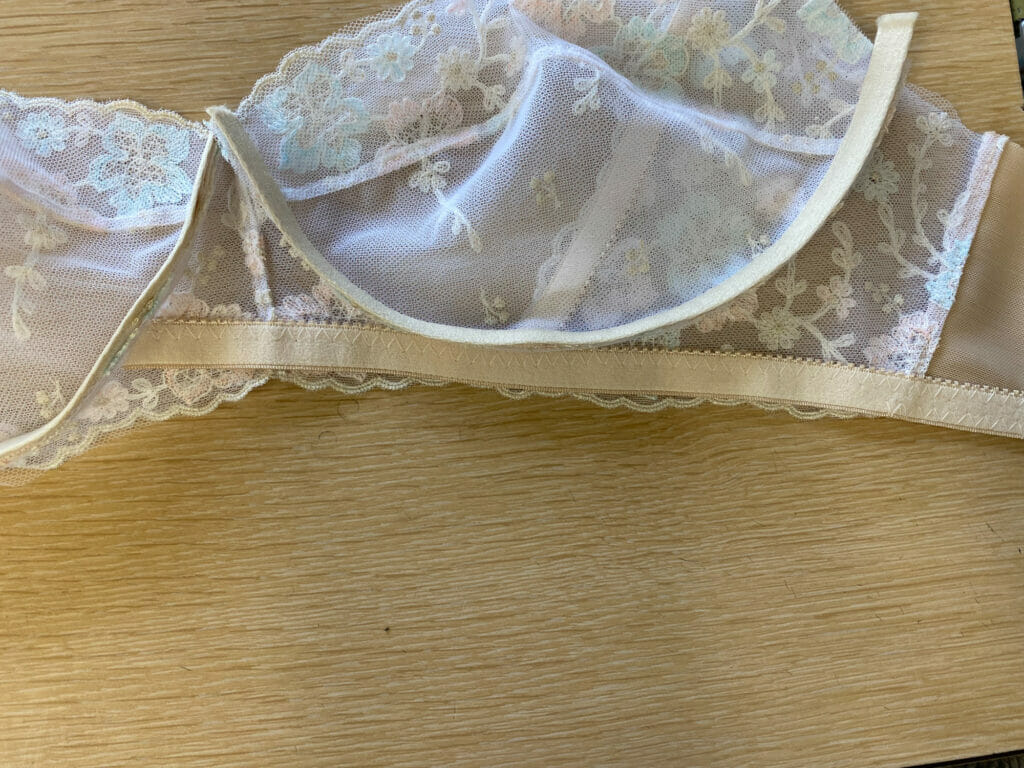
Then trim the extra powernet outside your zig zag stitches, and flip your elastic to the inside and stitch down for your second pass of the elastic, when you reach the side seam the elastic will continue along the lace edge, continue your stitching along the inside edge of the elastic all along the bottom of the cradle following the edge of the lace.
When you get to the center front, stop following the lace edge and let the elastic continue in a straight line until you reach the cup. At this point you can trim your elastic down to the perfect length, and make sure your elastic goes right to the seamline so the cut edge of the elastic will be enclosed by the channeling.
Then, starting at the side seam, sew a second row of zig-zag stitches along the bottom edge of the elastic, securing it down.
Repeat this on the other side, crossing the elastic in the center front.
This will finish the bottom of your cradle and back band beautifully 🙂 Then you can continue with the rest of the bra construction as usual.
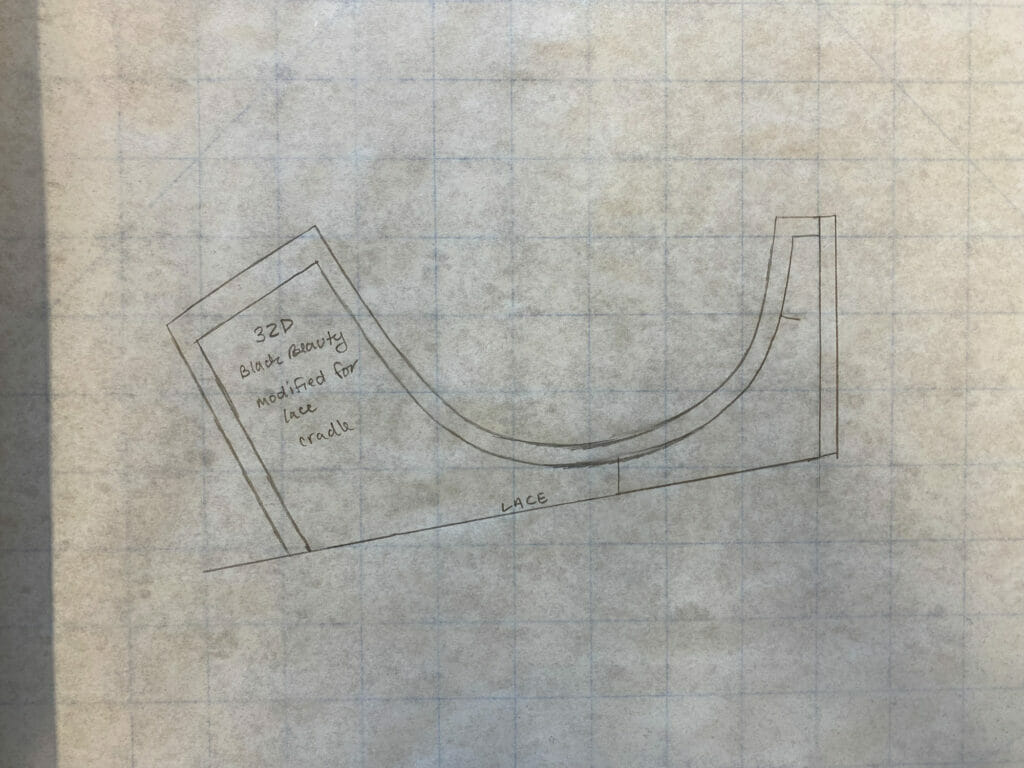
The Once-Piece Cradle Modification
This modification, as the name says, is when you make the cradle one piece and straighten it along the bottom edge for lace. This is a really simple pattern modification, and it’s a great option if you have a lace where you don’t want to interrupt the pattern, it’s also easy to modify into a long-line bra style. The only drawback to this modification is that it’s straight across the bottom of the bridge, instead of having an upward curve, which can be a bit less comfortable if you have a flared ribcage or a protruding stomach- the bridge can tend to cut in along the bottom edge when it’s straight like this, so it can be less comfy for some body shapes- just something to keep in mind.
The Pattern Modifications
Start by tracing the top, underwire curve and cradle seam on the bridge piece.

Then match up your outer cradle piece at the cradle seam and trace the outer cradle on both sides of the bridge making one cradle piece, leaving the bottom line of the cradle untraced.
Then, use the bottom of the cradle seamlines as your guide, draw a line straight across the bottom of the cradle. It’s important not to make your cradle any shorter than the cradle seam because that is the length that you need to apply your elastic along the bottom of your cradle.
At the side seam you’ll see there’s a small gap at the bottom where the cradle is longer at the side seam than before, so you can continue the side seam to meet the new bottom line of the cradle, and your new cradle is all ready!
The last part of this pattern alteration is to make sure your cradle side seam matches the back band side seam, and extend the back band side seam to match the extra length in the front.

Then cut out your pieces- in this case I had the perfect lace to follow the shape of the bridge.
The Sewing Modifications
The modifications to for sewing this band are very similar to the two piece band, you will sew the back band piece to the cradle with the extra length for the elastic allowance along the bottom band.
But when you sew the bottom band elastic to your back band piece, instead of cutting a piece long enough to criss-cross in the center front, you will measure the distance of the cradle and then continue sewing your elastic to the back and on the other side of the bra, so that your elastic is one continuous piece going straight across the bra. I find that it’s good to measure the length of the cradle and then reduce that measurement slightly when you measure your elastic so that you stretch it a little when sewing and you aren’t left with an elastic piece that is too long for the cradle edge.
Just like in the two-piece cradle, be sure that you apply your first pass of the elastic to the right side, plush side of the elastic up, and make sure that the edge of your elastic meets the join where your lace cradle meets the back band.
Then flip your elastic to the inside and sew the second pass of zig-zag stitching along the inside edge of the elastic. In this bra I stopped at the side seam so I could switch thread colours for the cradle, but you could continue this line of stitches along the cradle to the other end of the bra.
If you didn’t stitch along the top of your elastic in your cradle on the previous step, then stitch that now, and then do a zig zag stitch along the bottom of your elastic to complete the bottom band. Then you can continue sewing the rest of the bra following the usual instructions.

Voila!
Which method do you like best? I think it really depends on which lace you are using, because they both can have a beautiful result.
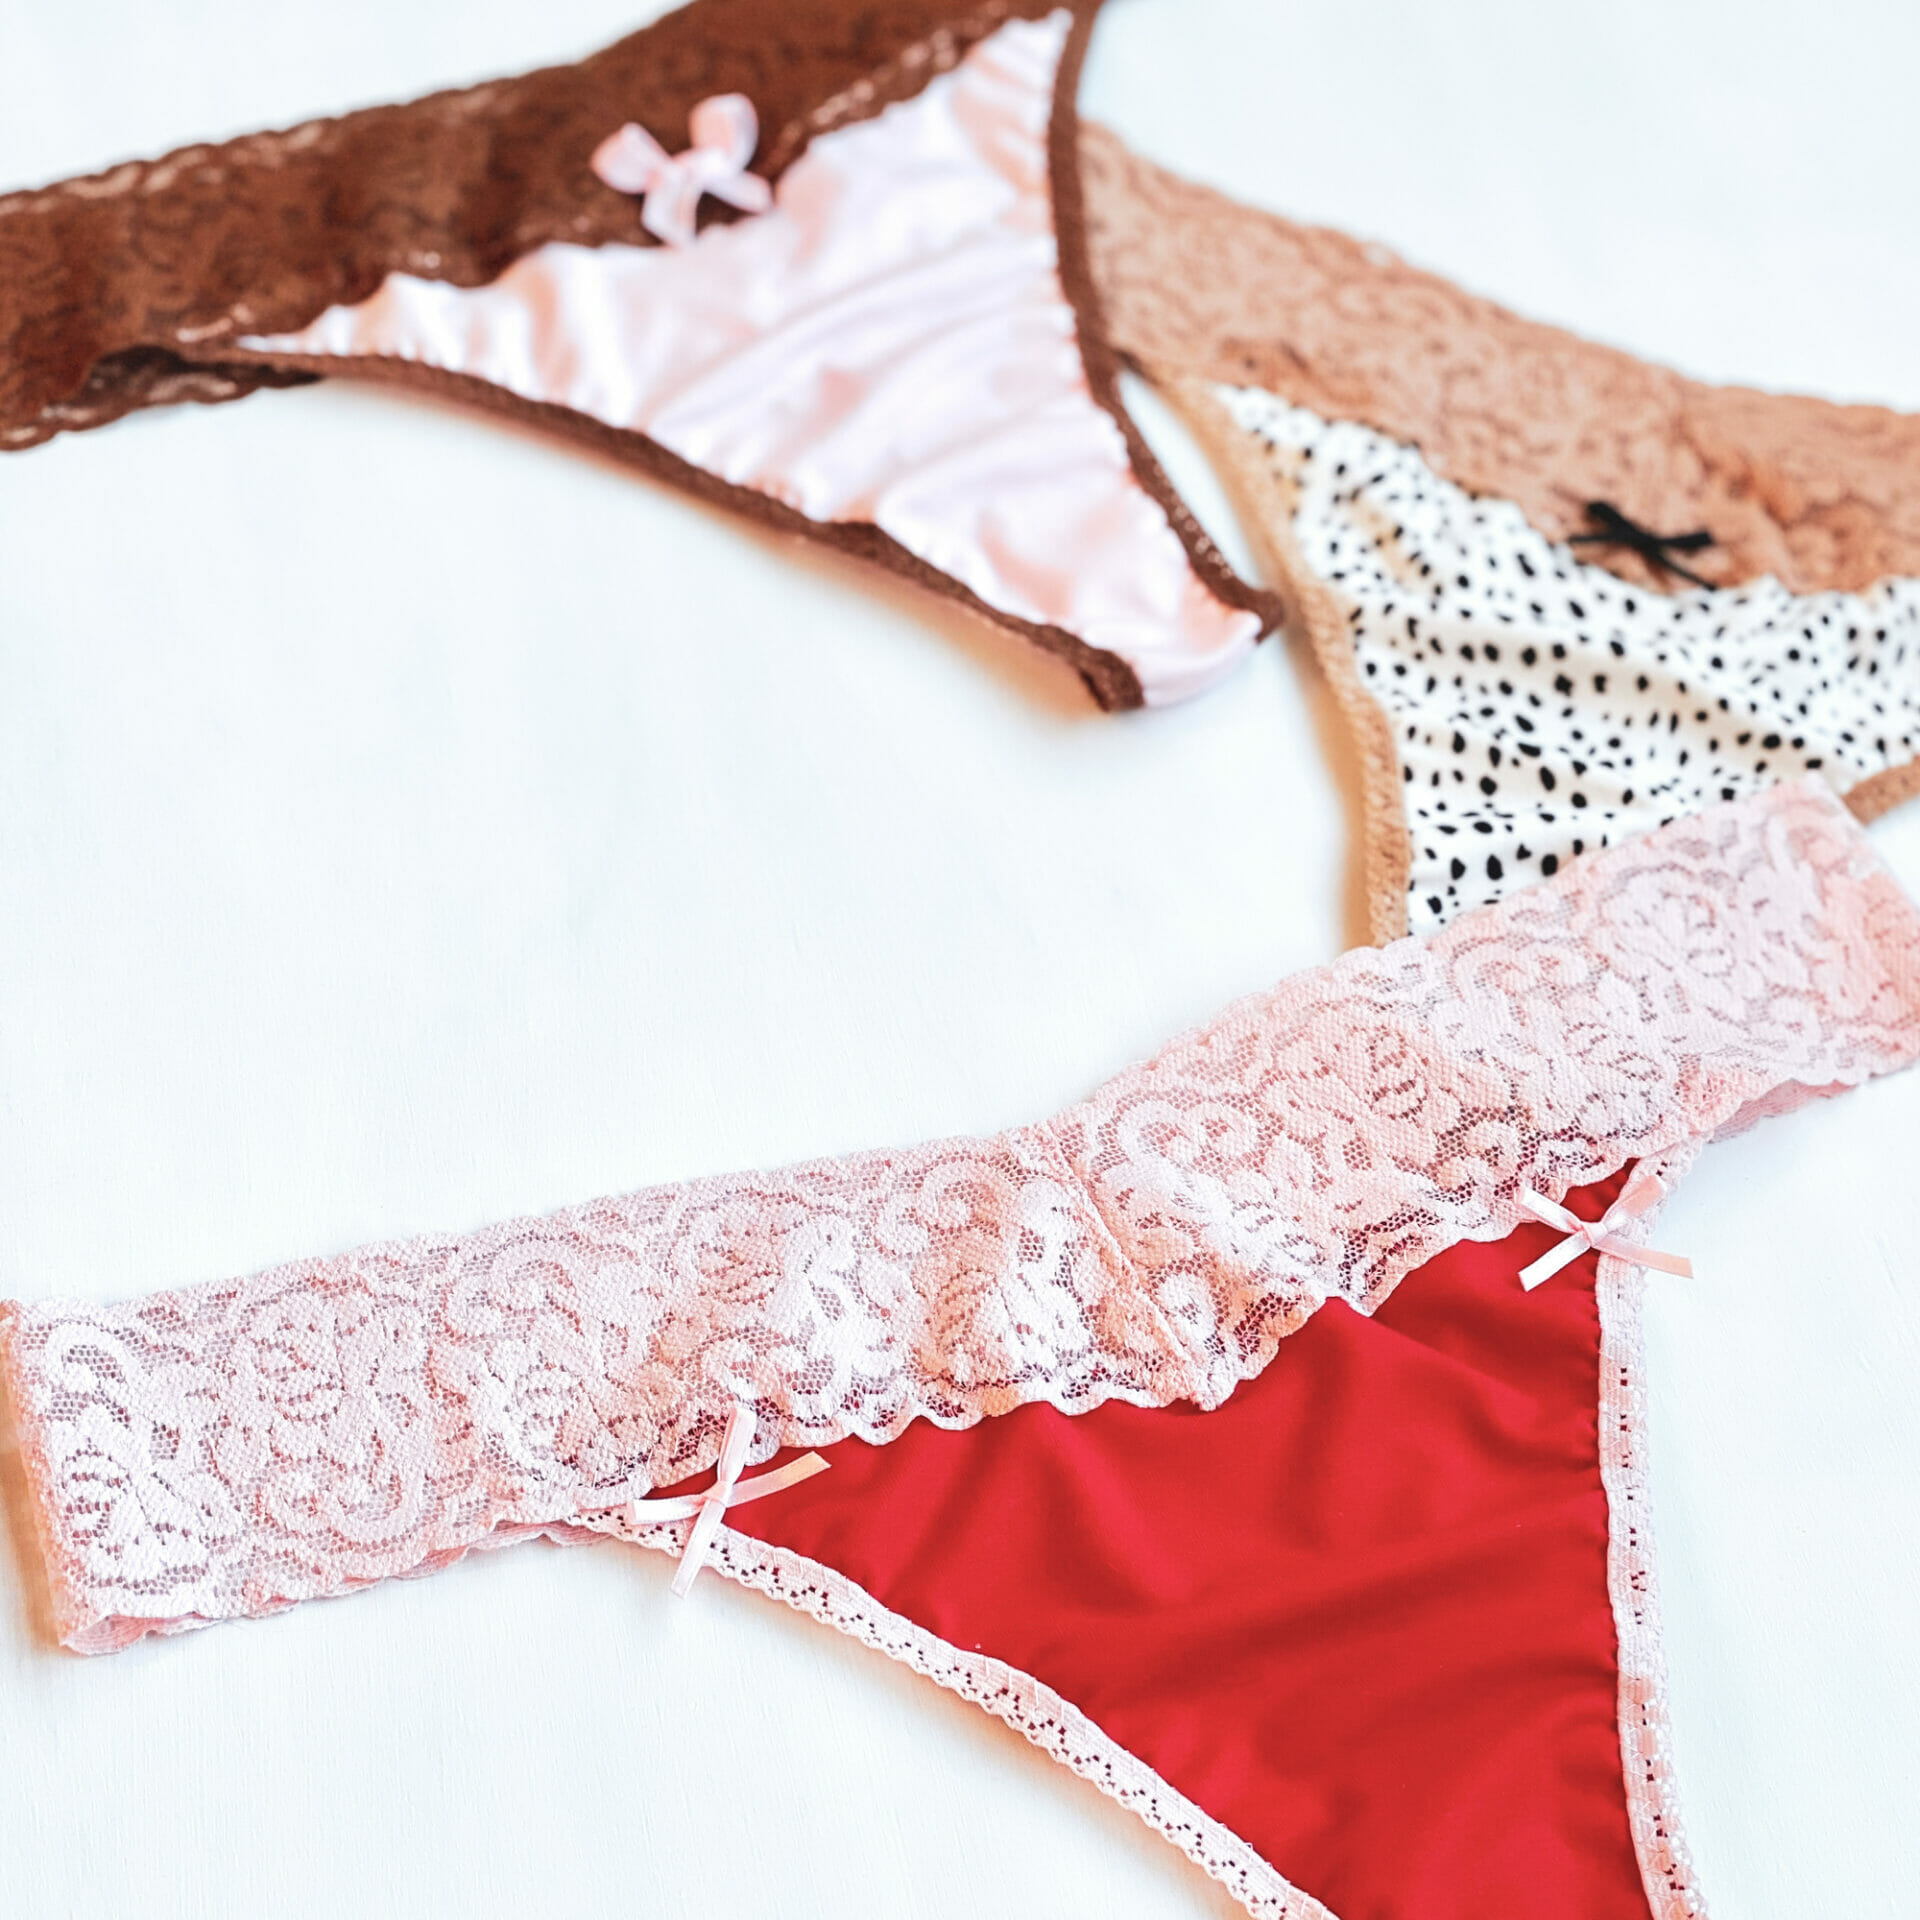
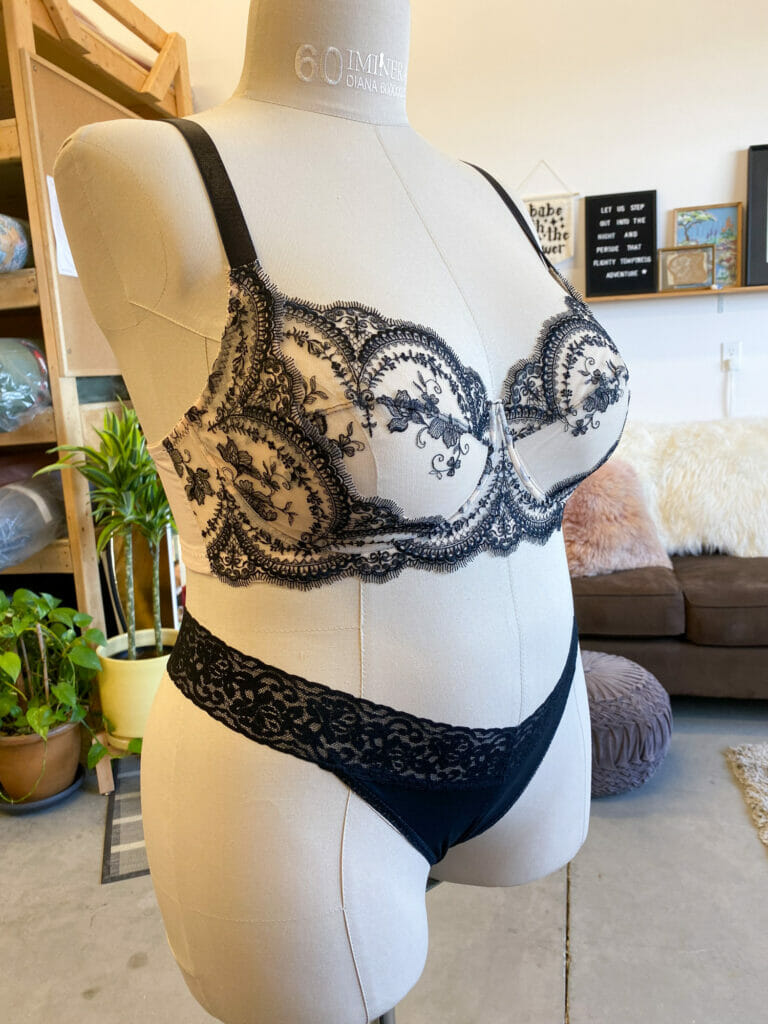
I’d love to know if you found this tutorial helpful, and if you are looking for my Black Beauty Bra pattern to make this, you can find it here, and you can find lots of supplies to make these bras in my shop. I made the bra on the left with my Cotton Candy Blooms Lace Kit, and the one on the right with my Secret Garden Embroidered lace 🙂
Happy sewing!
xo
Erin
Thanks
Thanks it looks amazing!.. but i feel a video tutorial would be easier .. can you make a short video instead? !
I was just about to ask for a video as well, although thank you for all of the detailed instructions. I love this hack. Thanks for sharing!!!
Great explanations! Thank you for the tutorial.
Thank you so much for this explicative tutorial. It is worth a lot to me.
Hi Erin
Thanks for sharing your great hacks. Could you please show easy ways how to sew the channeling? My biggest problem. Thanks very much and have a great Sunday.